Deploying to Cloudflare
Deploying the RedwoodSDK app
Now that our application is complete 🥳, let's deploy it! This is the easiest step in the whole process.
In the terminal, run:
- npm
- yarn
- pnpm
npm run release
yarn release
pnpm release
Within the terminal, it will ask you: Do you want to proceed with deployment? (y/N):
Type y and press Enter.
Now... you probably got an error... Well, that's not good. Let's take a quick look at it.
  Cannot create binding for class 'SessionDurableObject' because it is not currently configured to
  implement Durable Objects. Configure a migration in your Wrangler configuration to add this class.
  [code: 10061]
  To learn more about this error, visit:
  https://developers.cloudflare.com/durable-objects/reference/durable-objects-migrations/


  If you think this is a bug, please open an issue at:
  https://github.com/cloudflare/workers-sdk/issues/new/choose
In case it's not obvious, it does tell us the problem. We are not able to create SessionDurableObject because we forgot to add it to the wrangler.jsonc. So, let's add it real quick.
  "migrations": [
    {
      "tag": "v1",
      "new_sqlite_classes": [
        "AppDurableObject",
+       "SessionDurableObject"
      ],
    },
  ],
Run the command again and it should deploy!
And it should also give you a handy link in the terminal if you want to check it out.
Deployed applywize triggers (2.29 sec)
  https://applywize.[username].workers.dev
Current Version ID: [some-UUID]
The values in the braces [...] will be specific to you.
Everything should just work! 🙌
Managing your deployment
Go to your dashboard in Cloudflare. In the left-side navigation open the Compute & AI dropdown and click on Workers & Pages. You should see your application in the list.
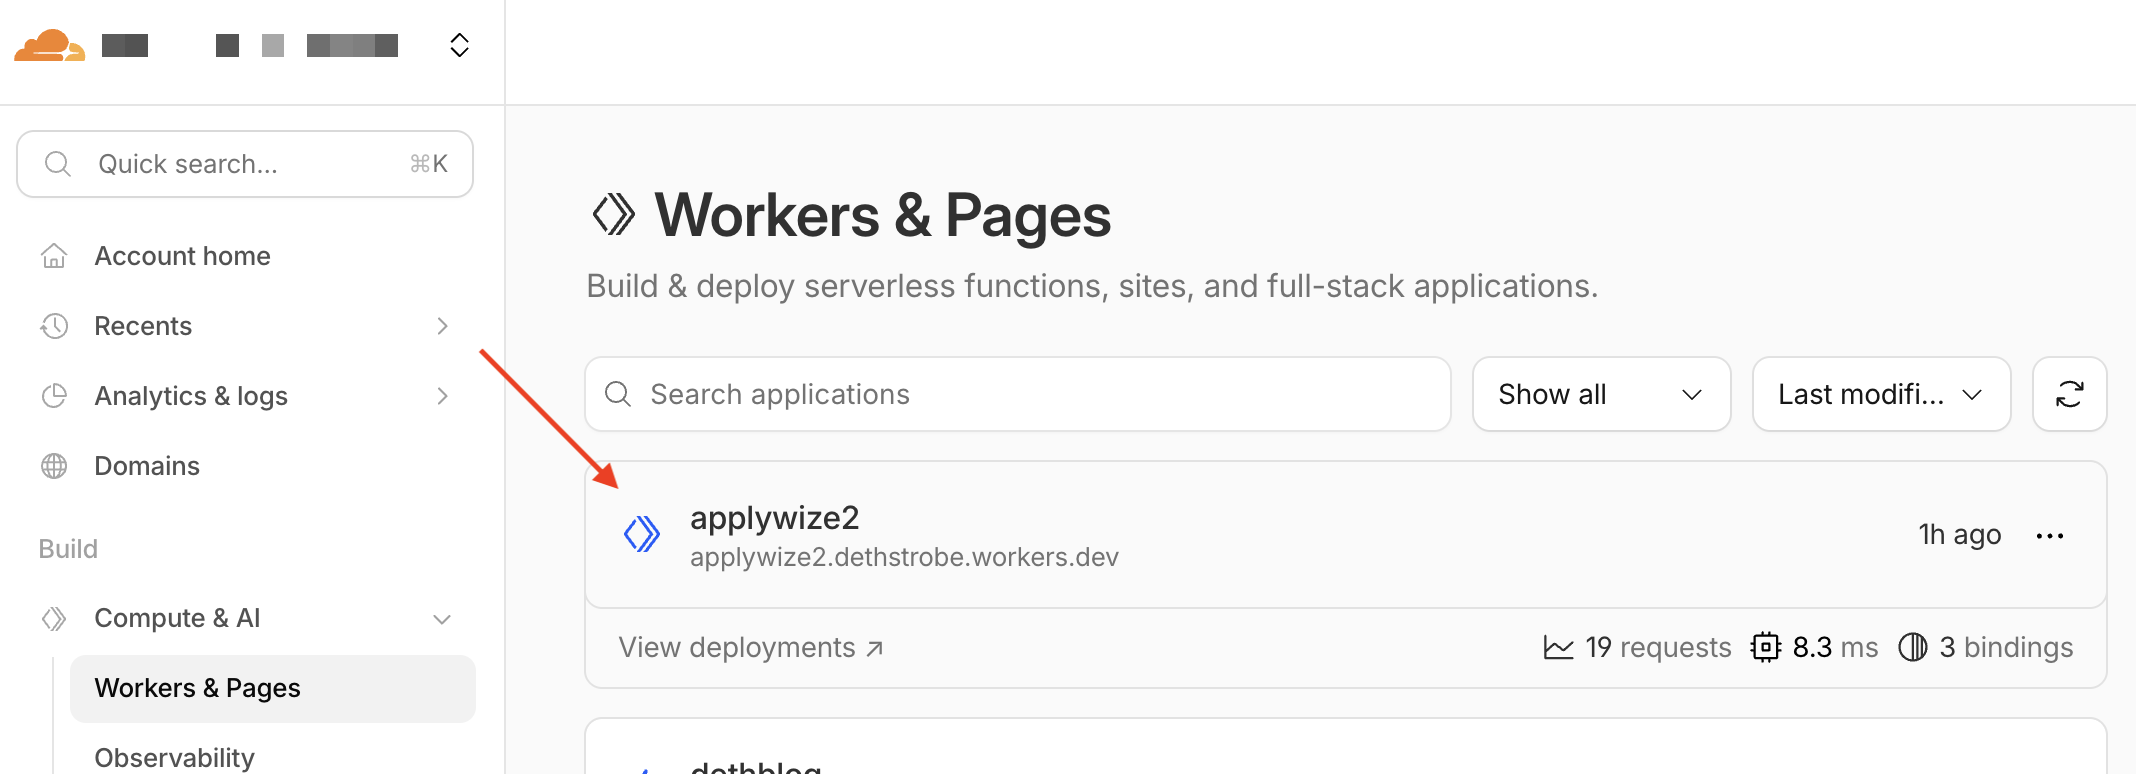
Details
Fun fact:
- My project is called applywize2, because this is the second time I've done this tutorial!
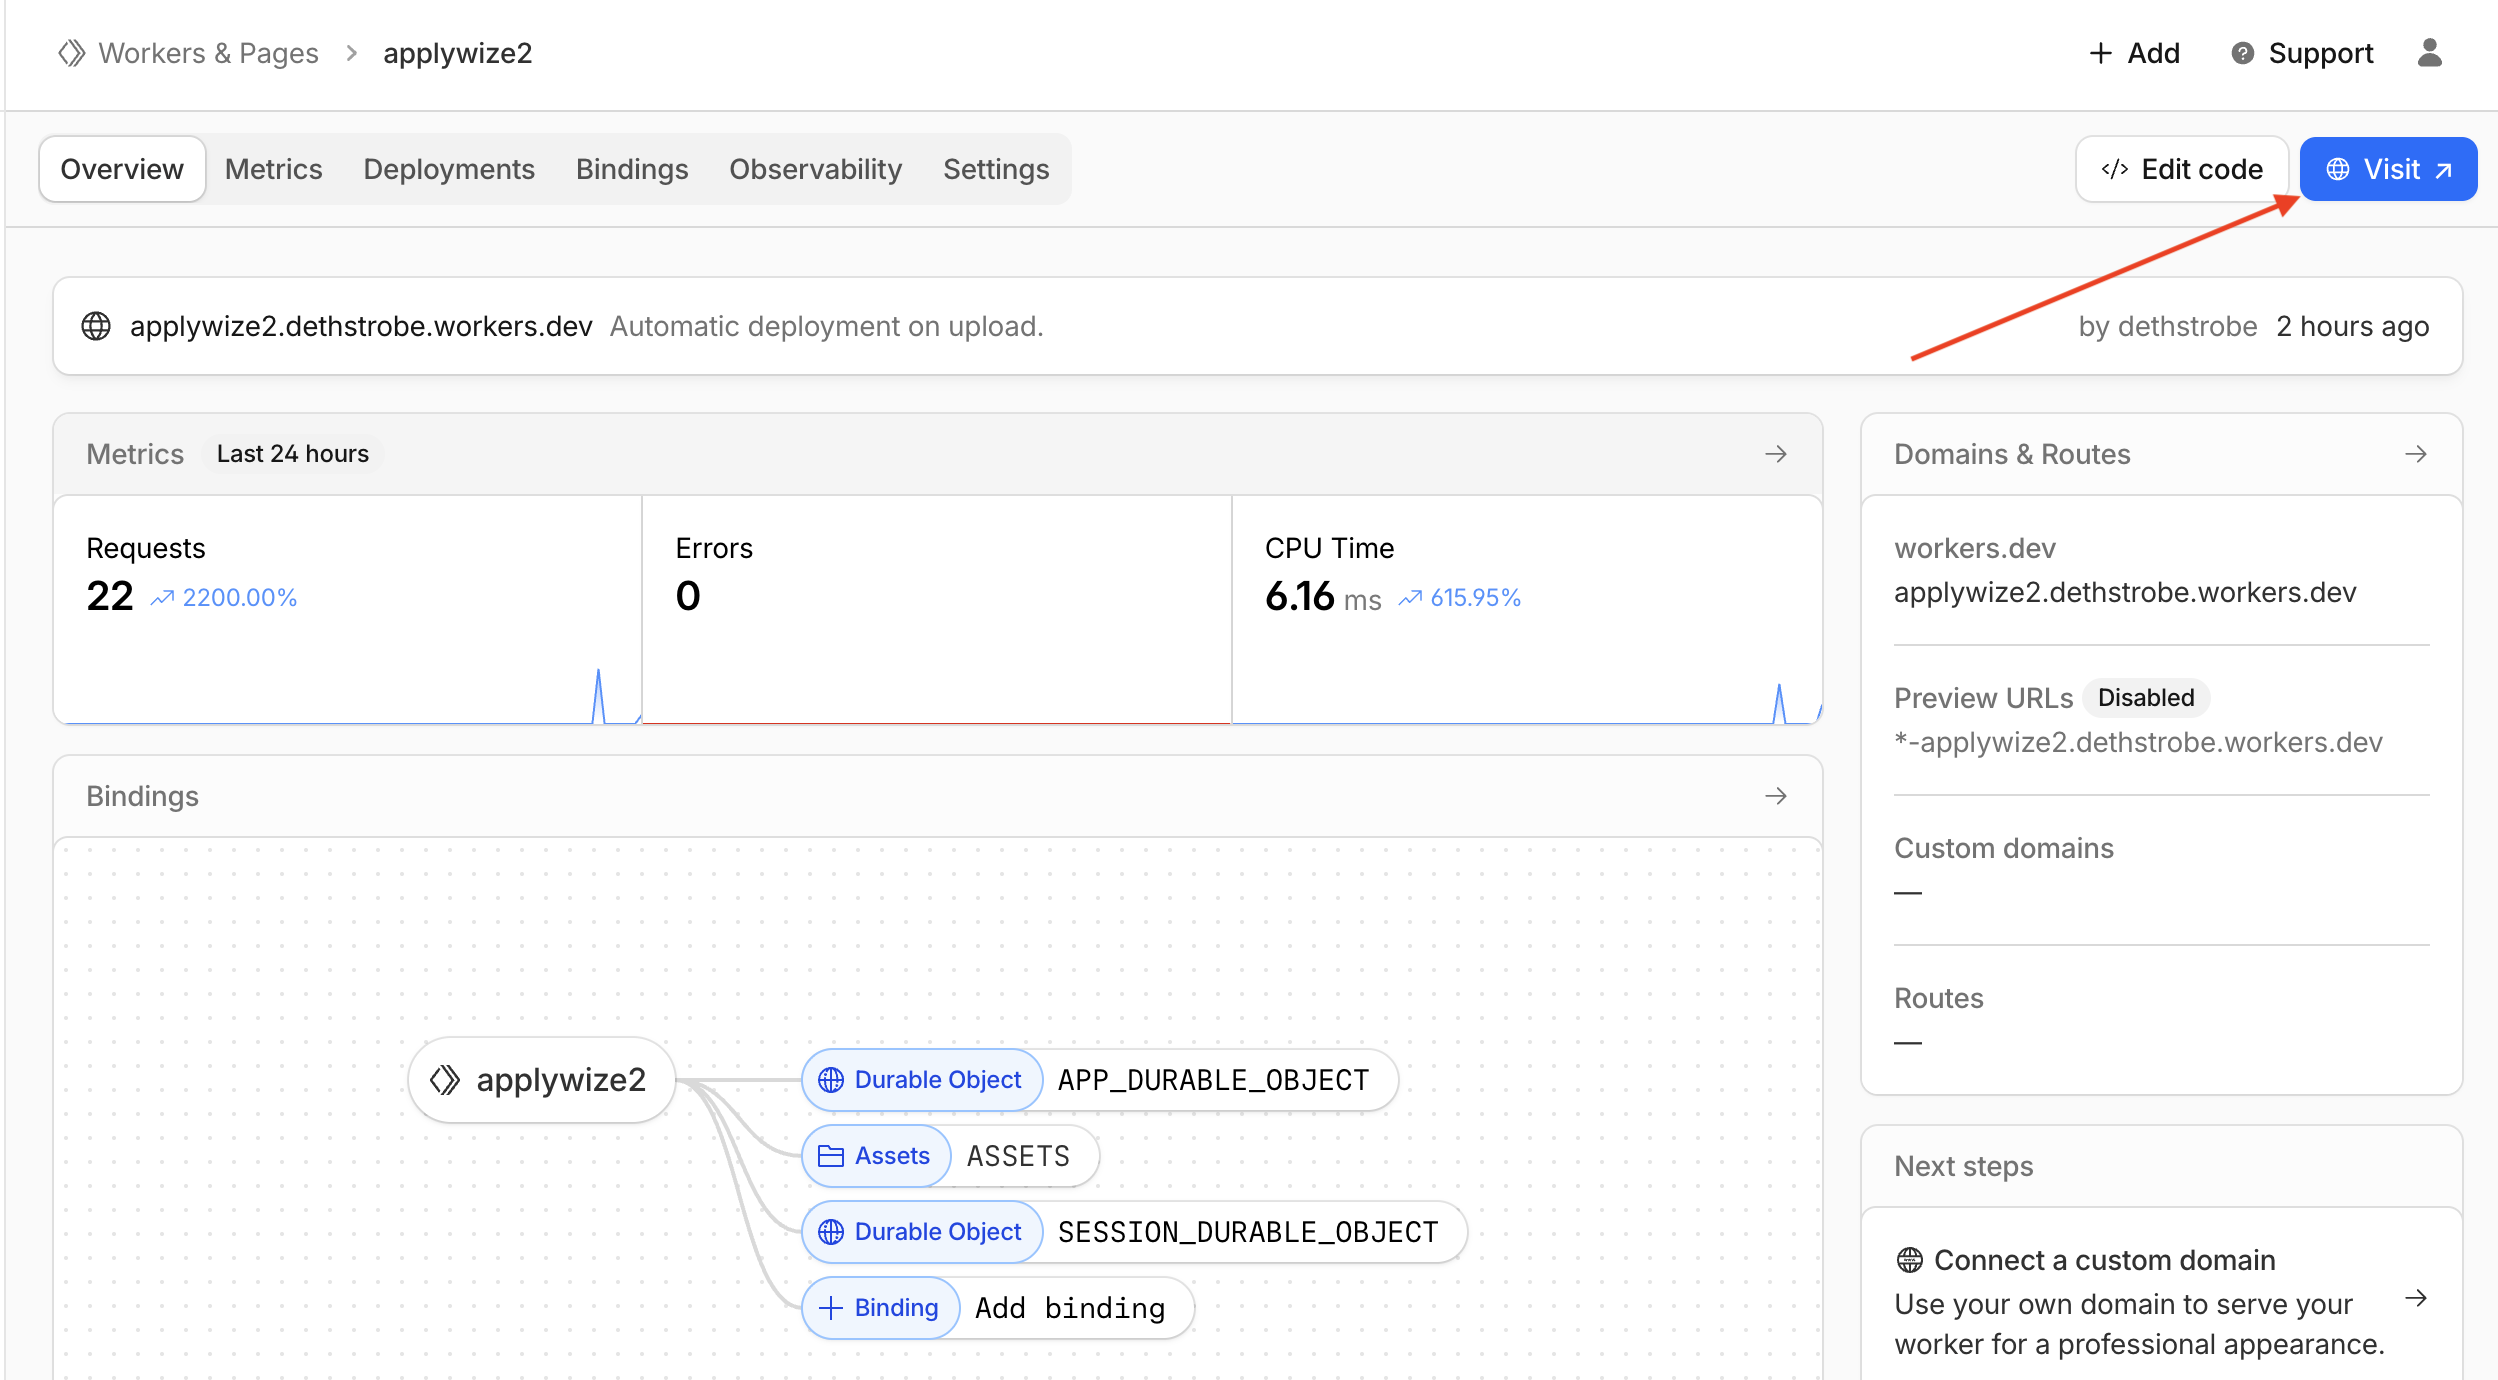
Then you can click your project (which they call an application) to see more details, metrics, and stats. You can also click on the visit button in the corner to see your current deployment.
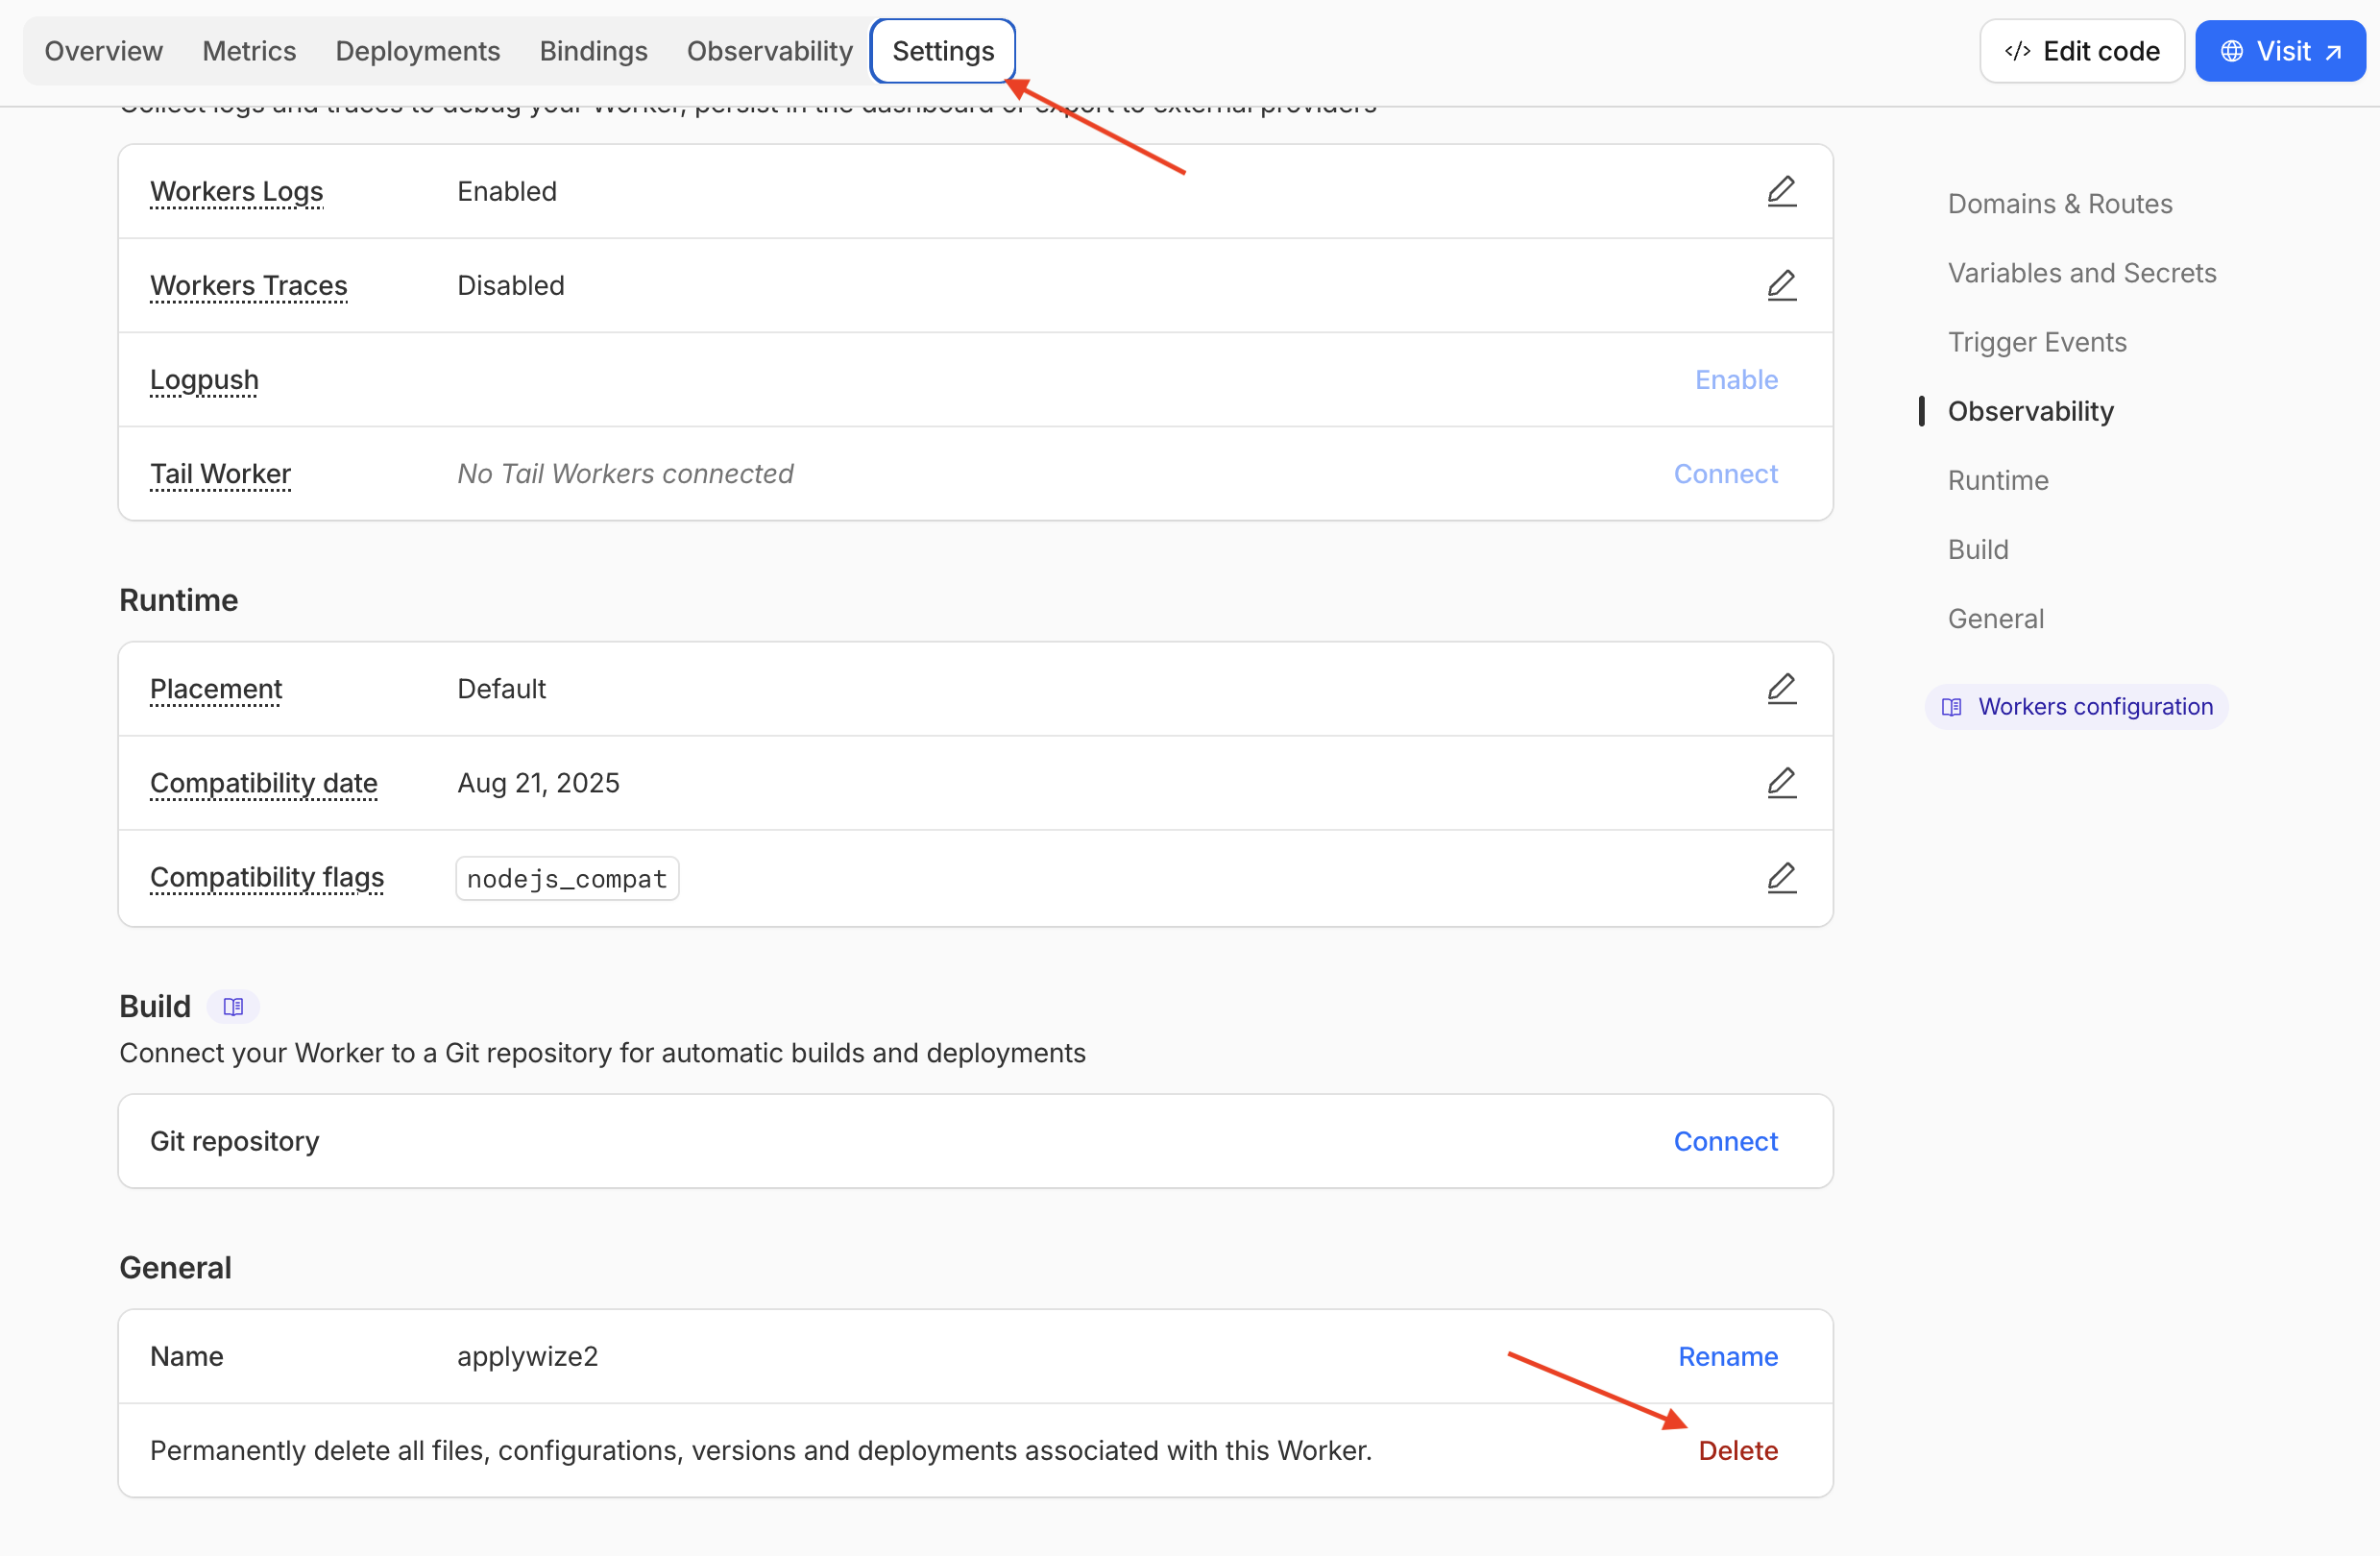
Deleting Your Project
If for whatever reason you need to delete your project in Cloudflare, click on the Settings tab inside the application details page (the one we navigated to earlier), then scroll to the bottom of the page. Click on the Delete button.
A confirmation modal will appear. Type the name of your project, then click the Delete button.
Using a Custom Domain Name
To use a custom domain name, open the same Settings tab we used for deleting the project. At the top, you'll see the domains associated with your project.
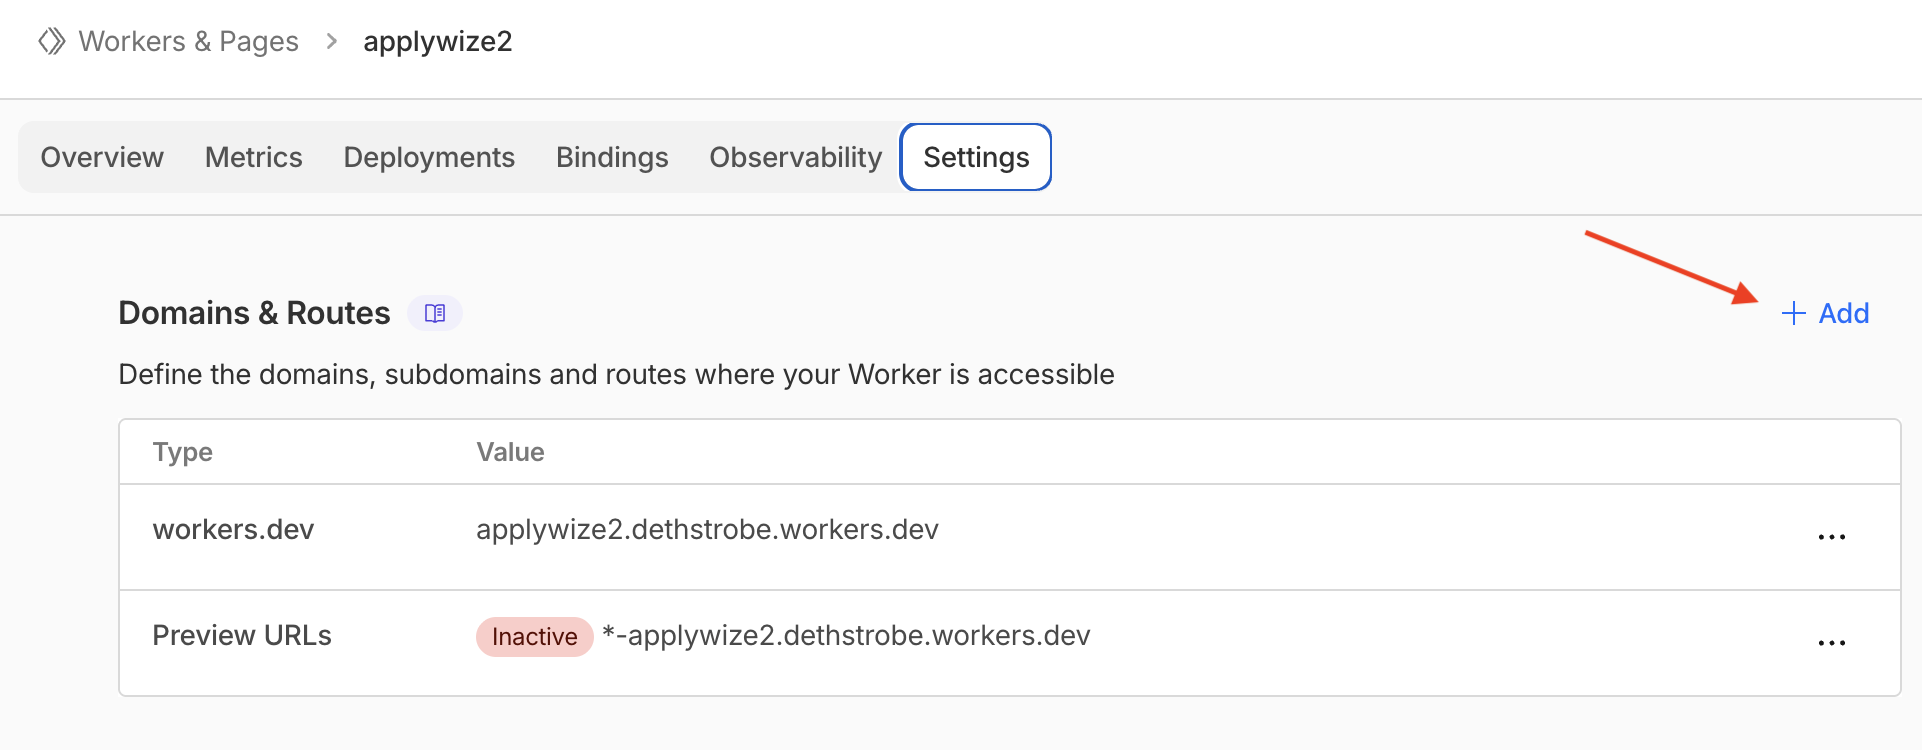
Click on the + Add button at the top of the Domains & Routes table. A side panel will appear:
Click on the Custom Domain option. Then it will ask you to enter the domain name you want to use.
If you buy your domain through Cloudflare, it should just magically work. Cloudflare was able to resolve the domain and assign SSL certificates.
Connecting our Application to GitHub
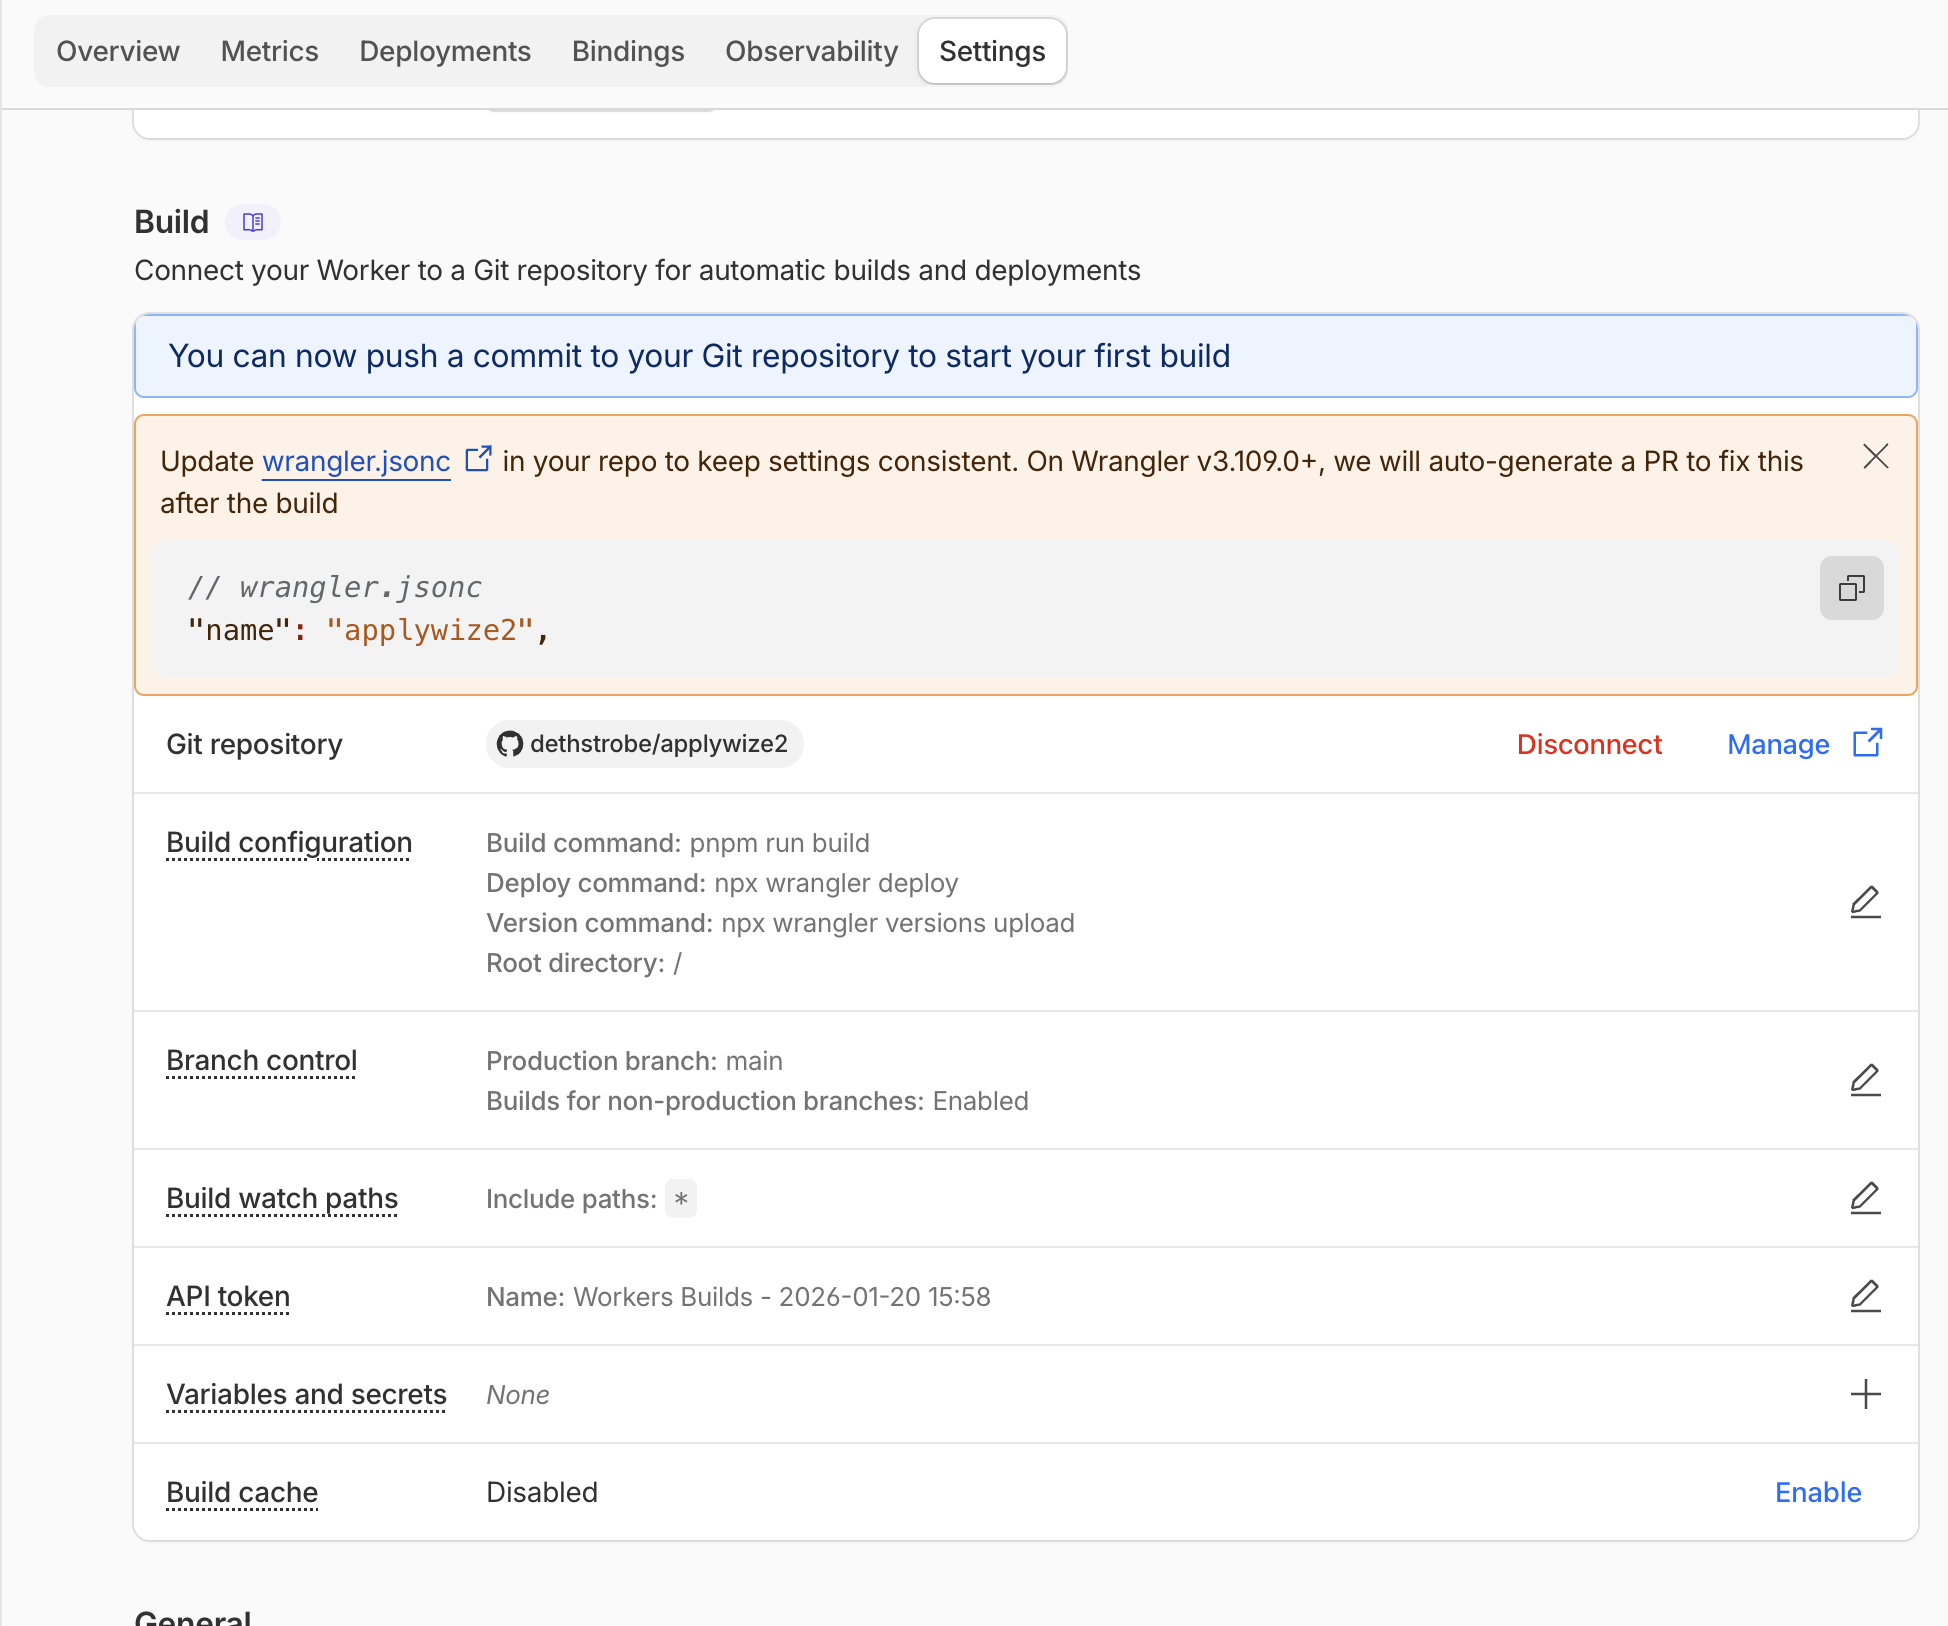
You can connect your application to GitHub, so that anytime you push a commit to a given branch, it will automatically deploy your application. On the Settings tab, near the bottom of the page, you'll find a section called Build where you can connect GitHub.
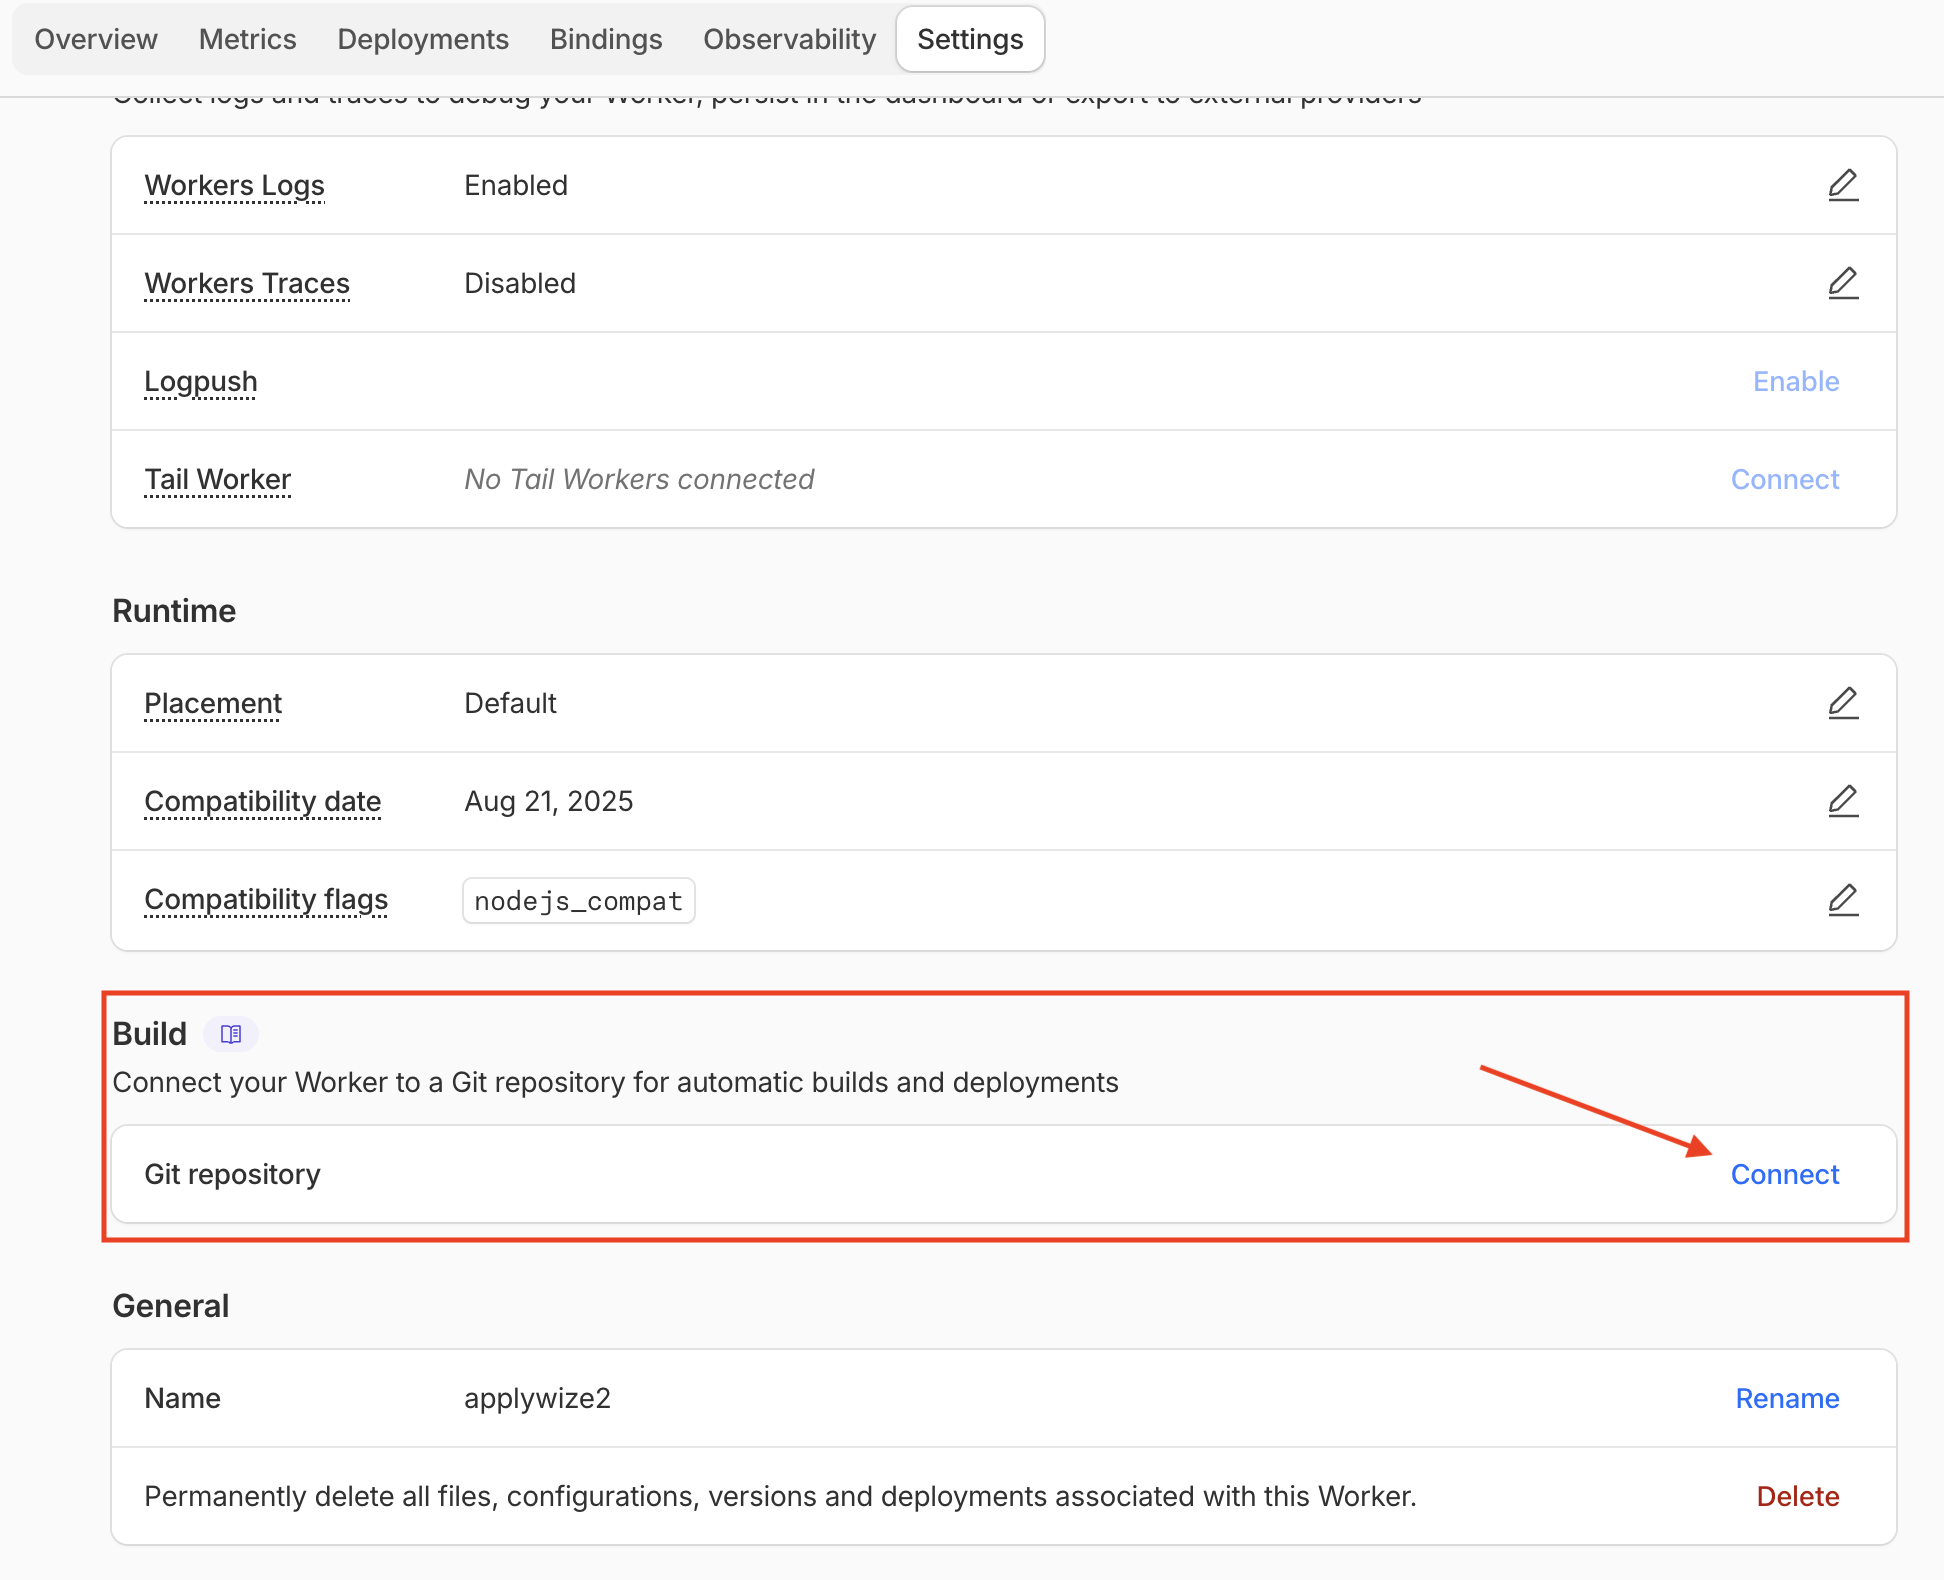
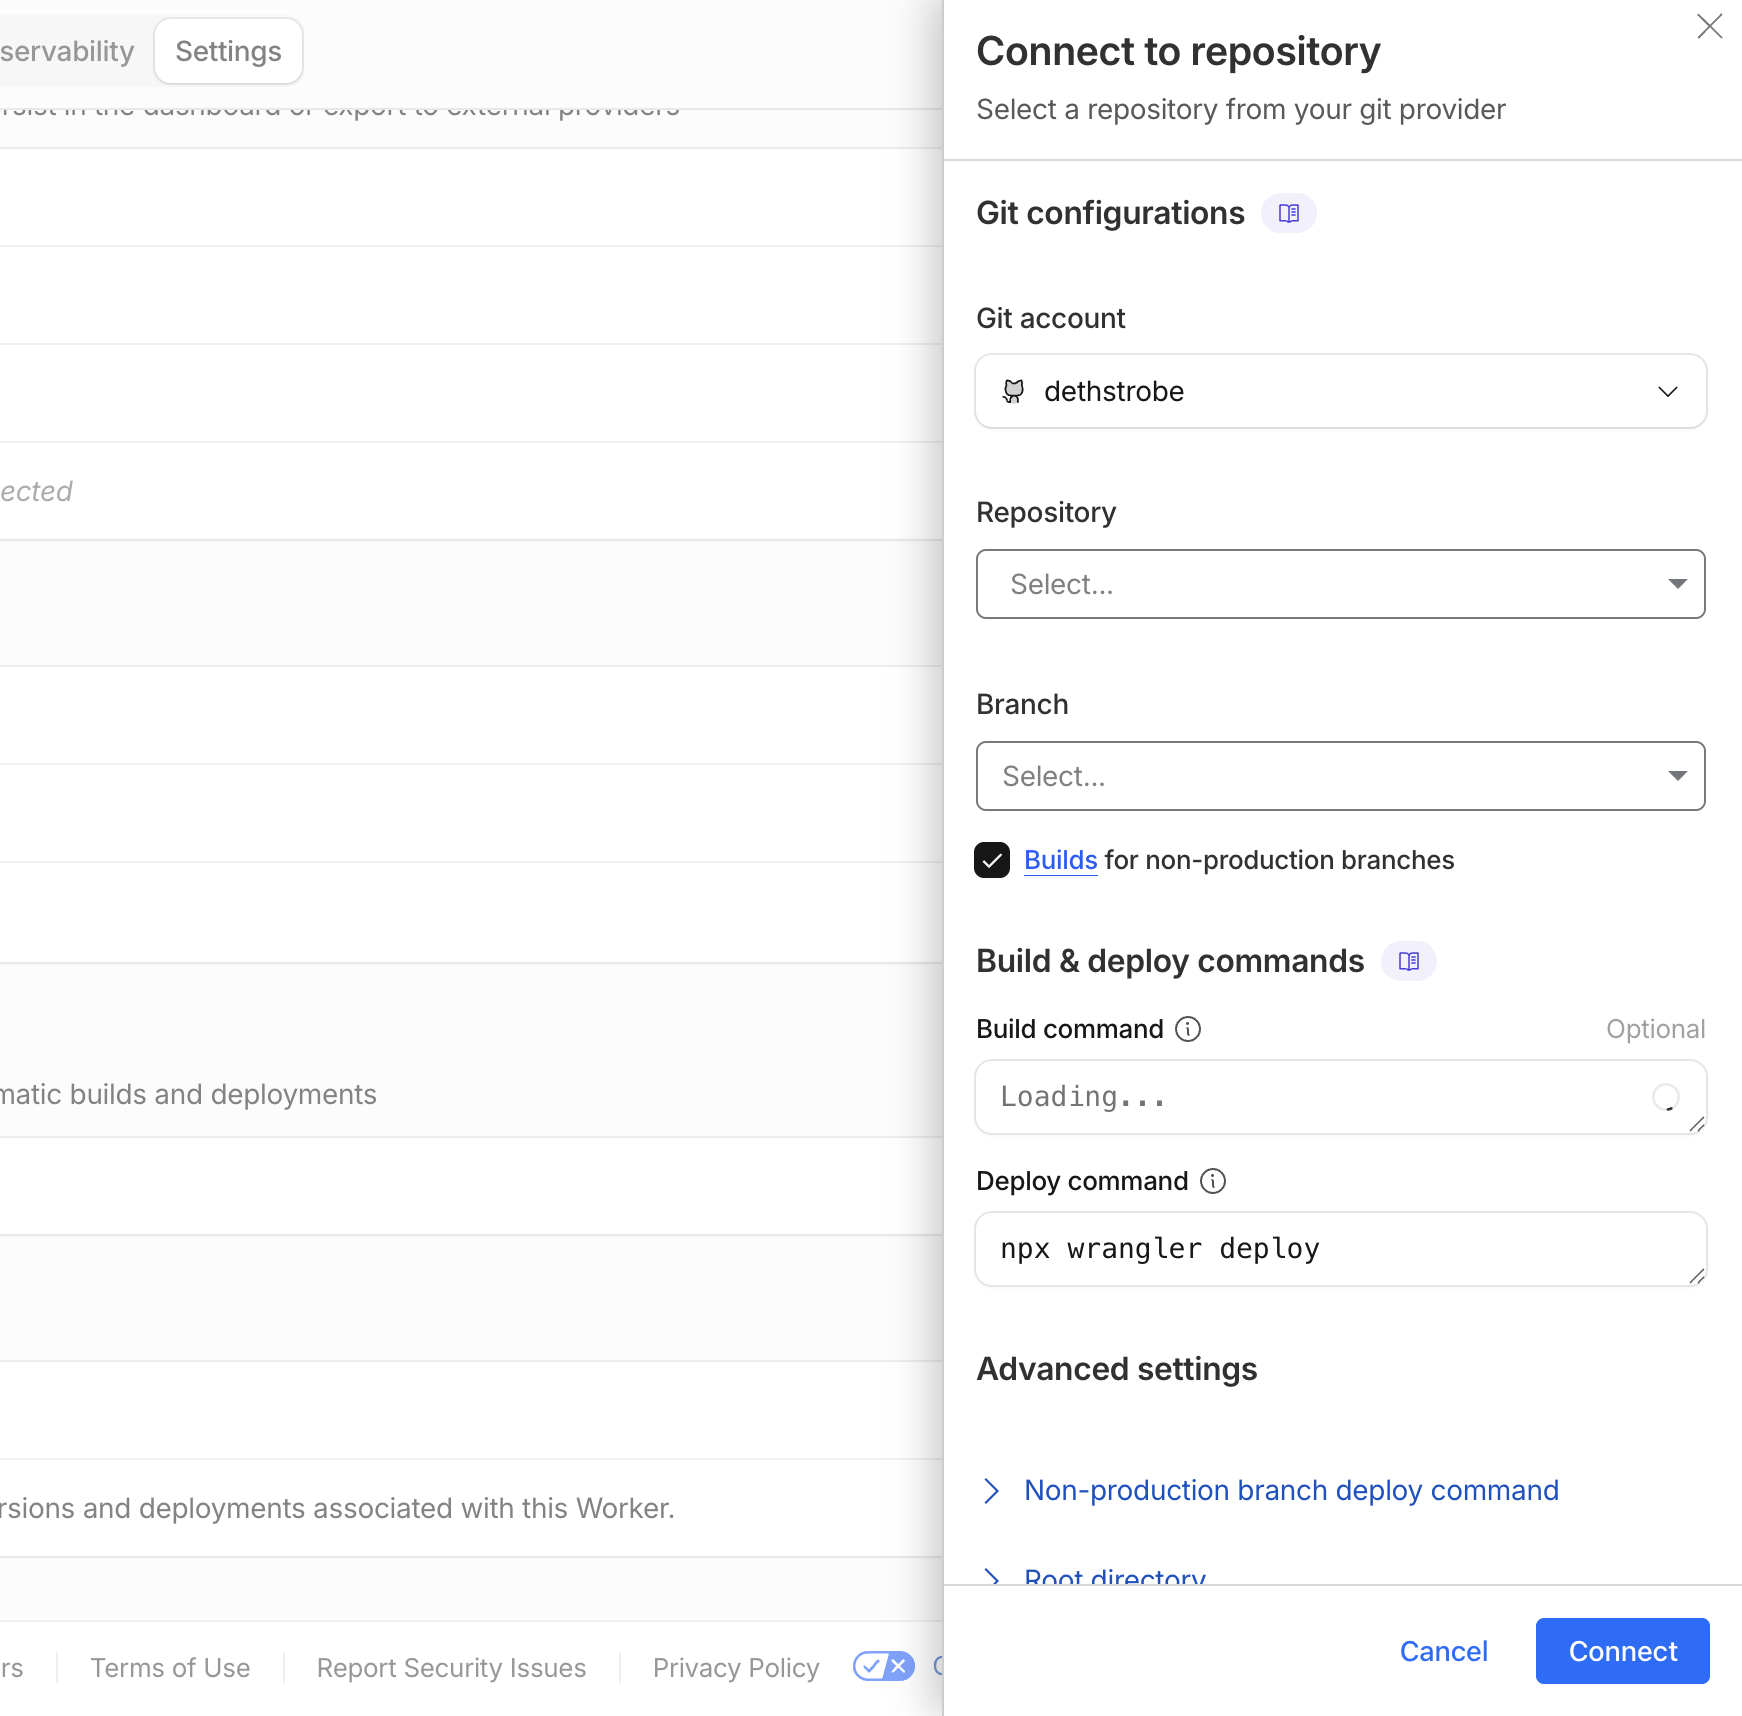
Click on the Connect button. A side panel will appear and ask you to configure the connection.
What if the repository doesn't appear?
If you don't see your repo, you might need to add the repo so Cloudflare can access it.
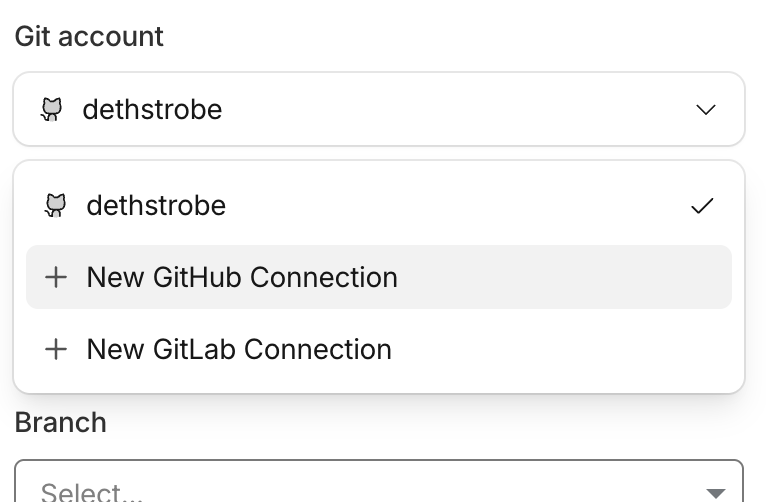
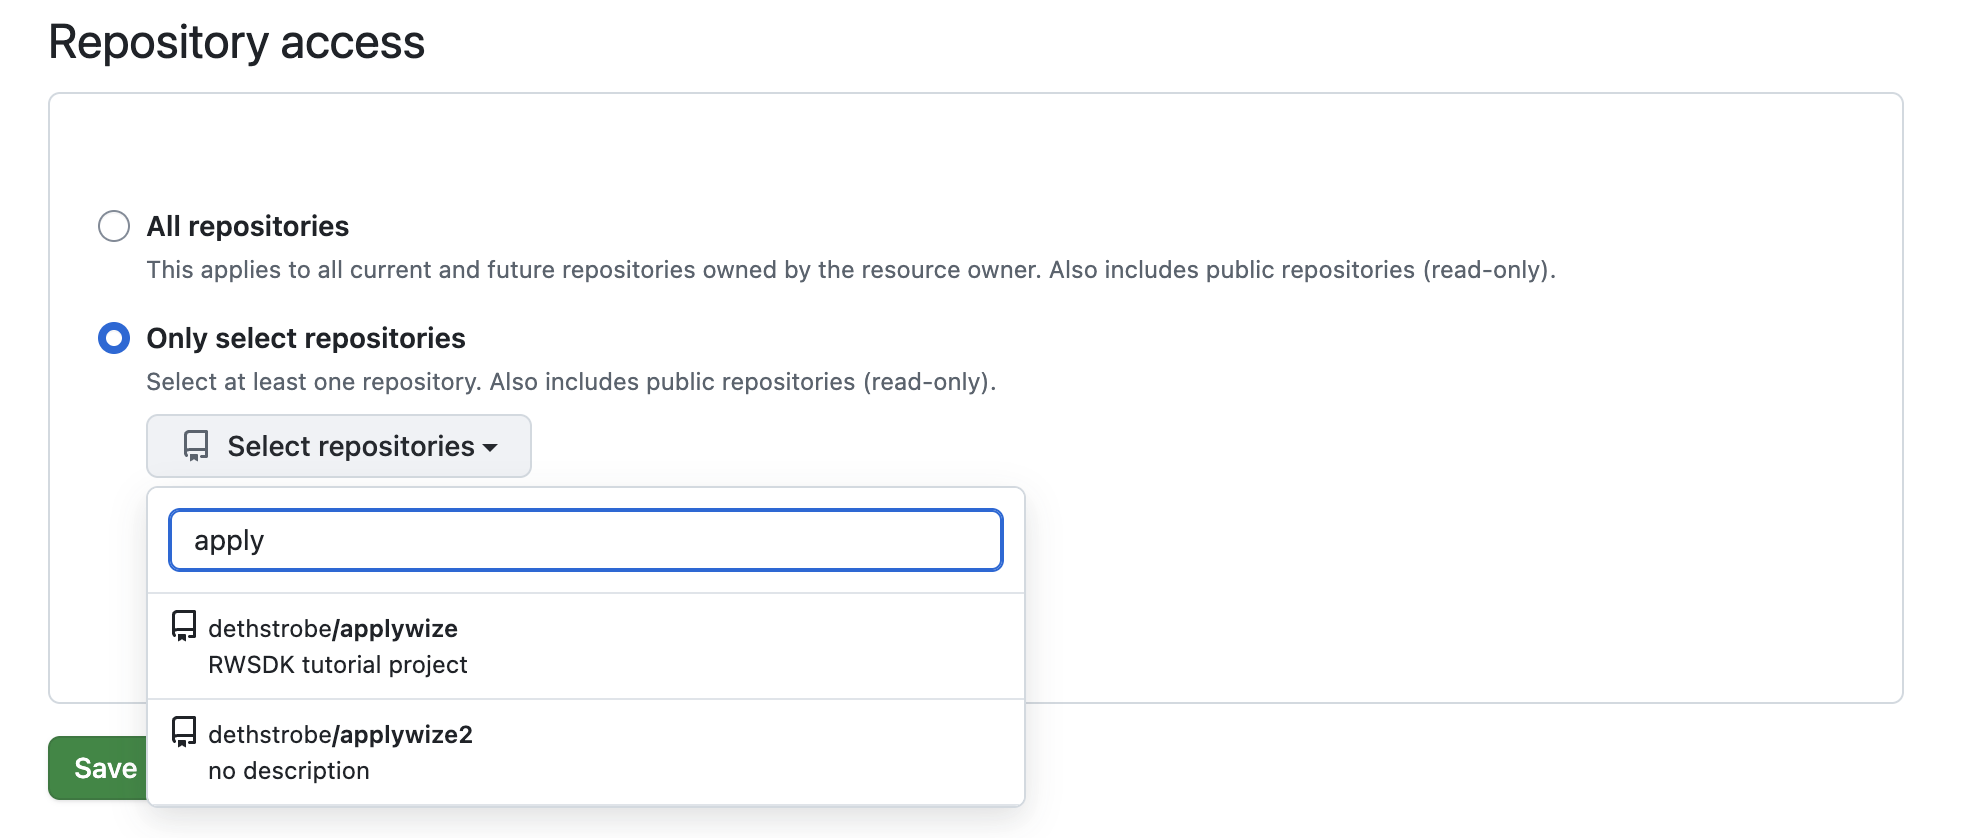
Click the + New GitHub Connection which will take you to a Setting page on github.com. Scroll down to the Repository access section and add your project to give Cloudflare permissions to access the repo. Click Save on this page. It should redirect you back to Cloudflare to finish the setup.
In most cases the default settings will work.
Once your repository is successfully connected, the Build section will update to show the connection.
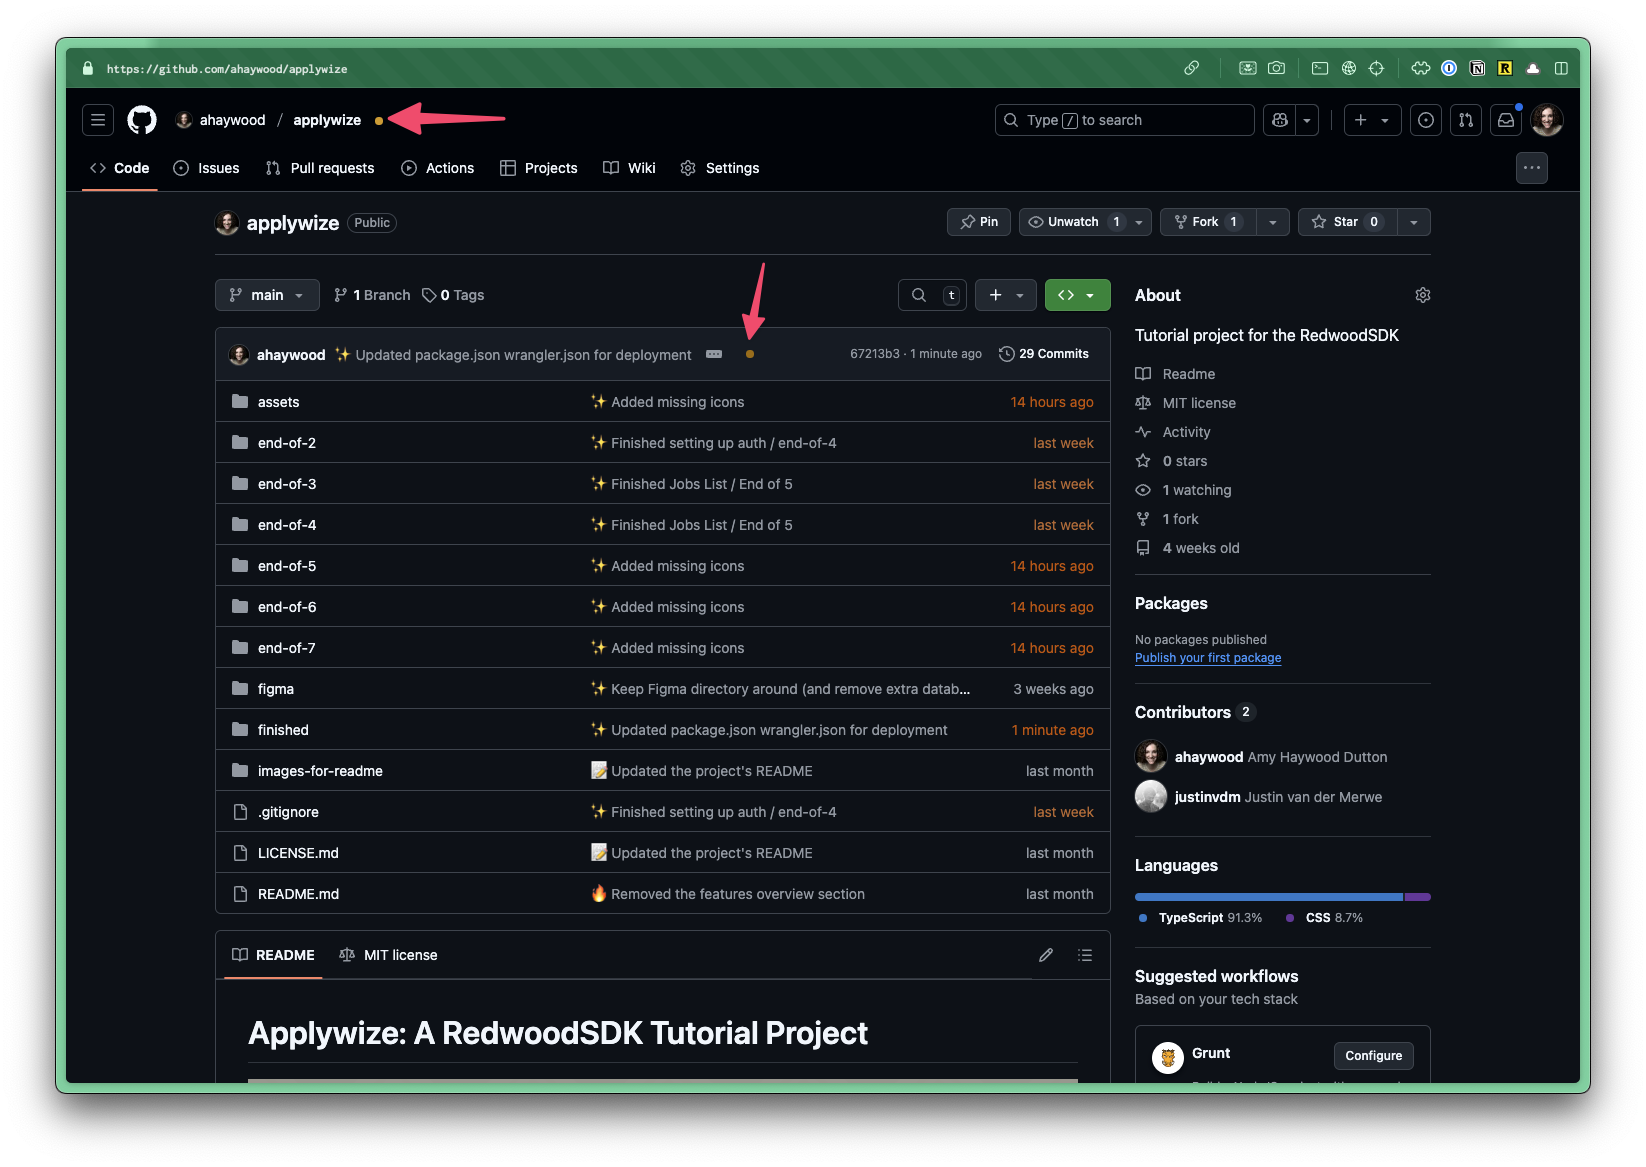
Try pushing a commit to the main branch and your application should deploy automatically. While it's building, you'll see a yellow dot next to the repository name in GitHub:
Once the checks have passed and the build is successful, the yellow dot will change to a green checkmark.
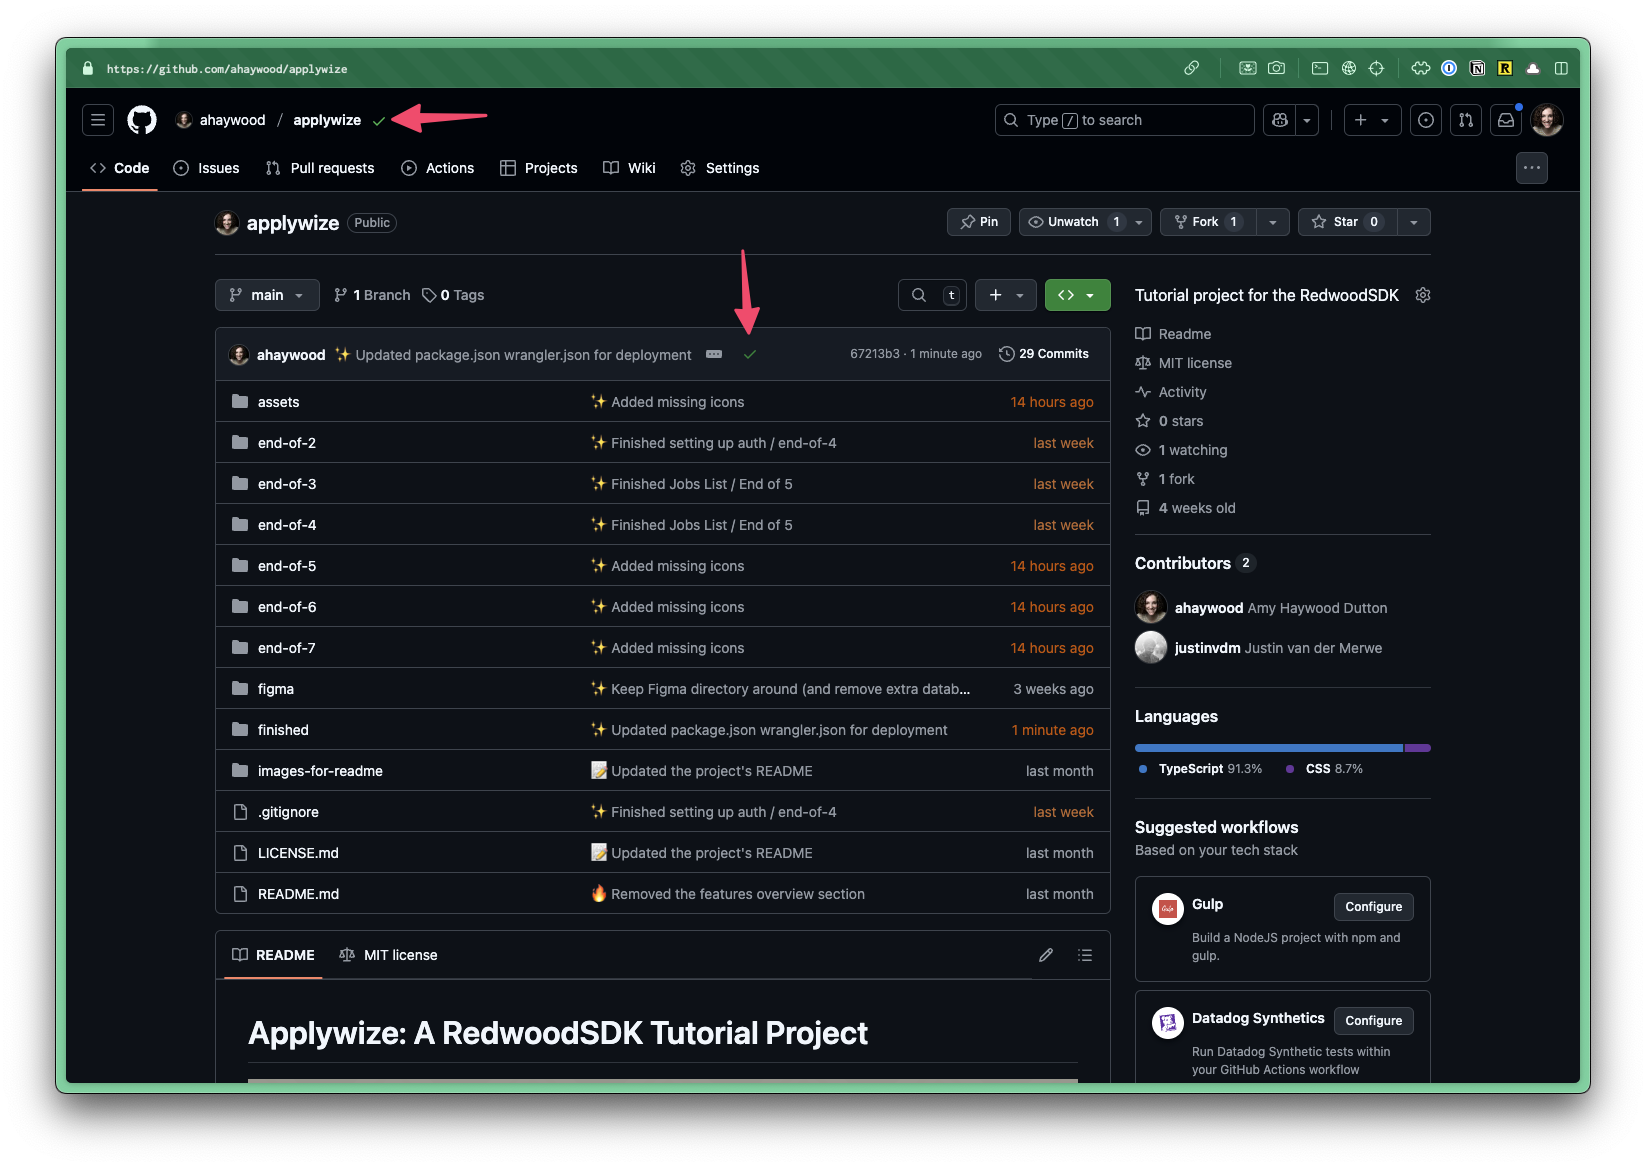
You can click on the checkmark to see additional details:

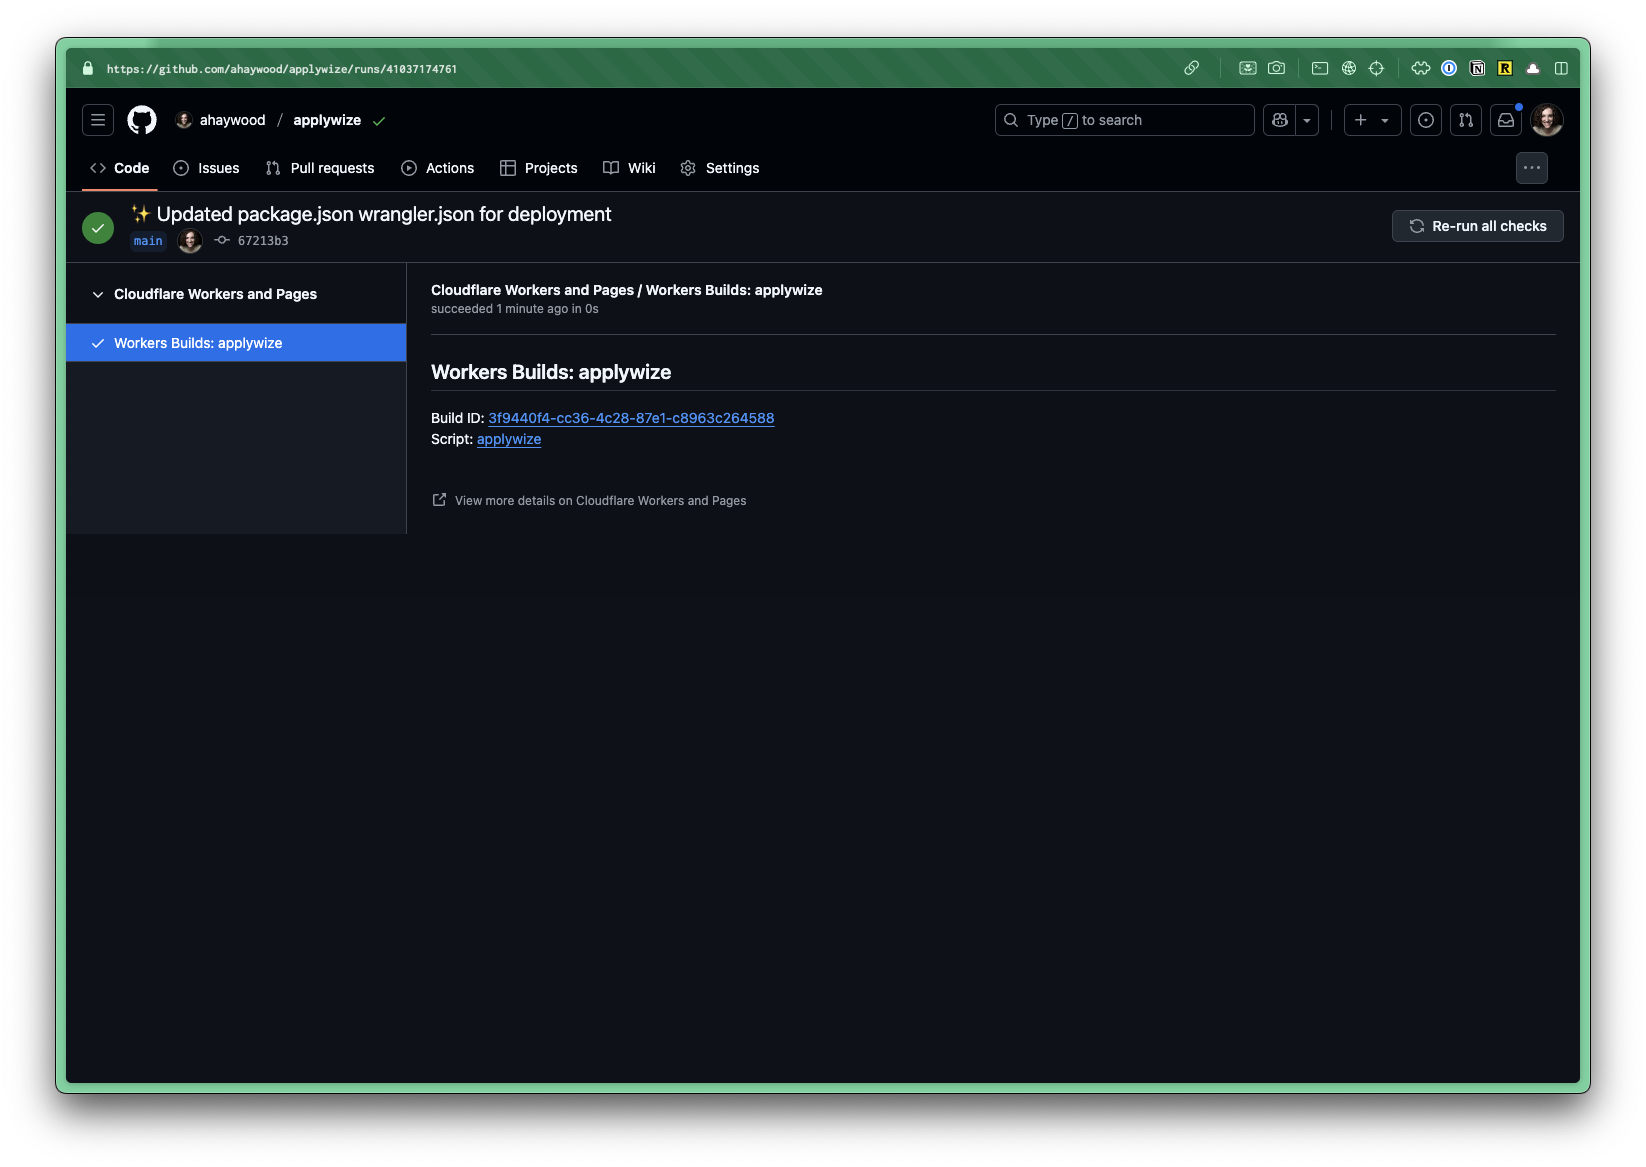
If you click on the Details link, it will take you to a dedicated page within GitHub:
Deploying Docusaurus site
Deploying our Docusaurus site will not be as straightforward, but it is still quick and easy.
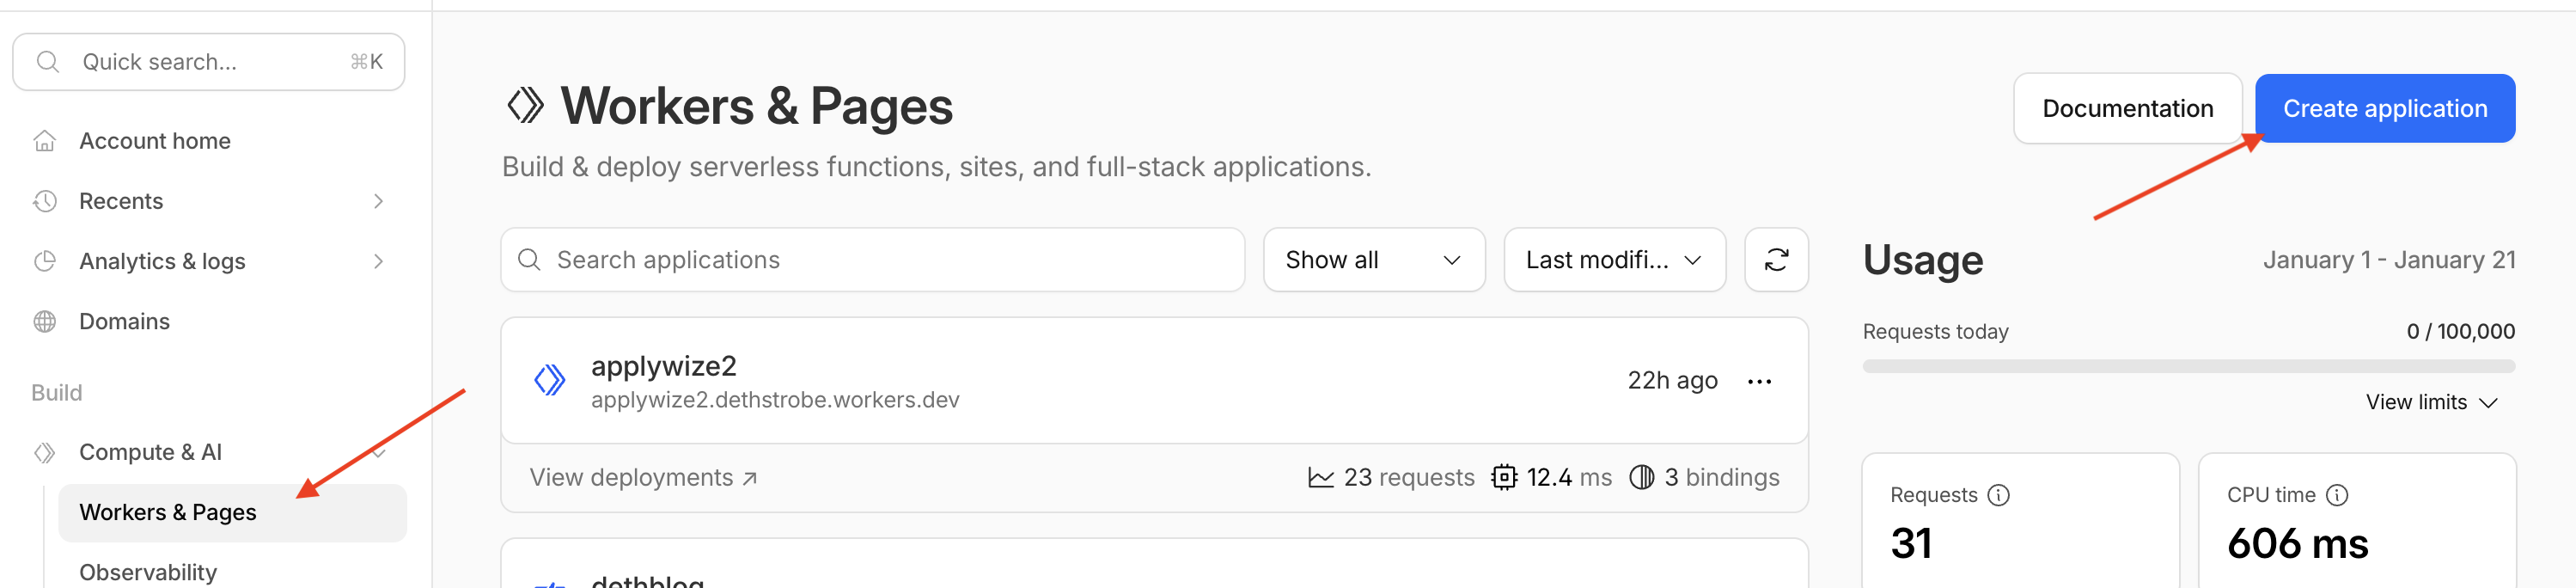
Again, we'll need to go to the Workers & Pages page, found in the Compute & AI dropdown in the left navigation. Then click the Create application button.
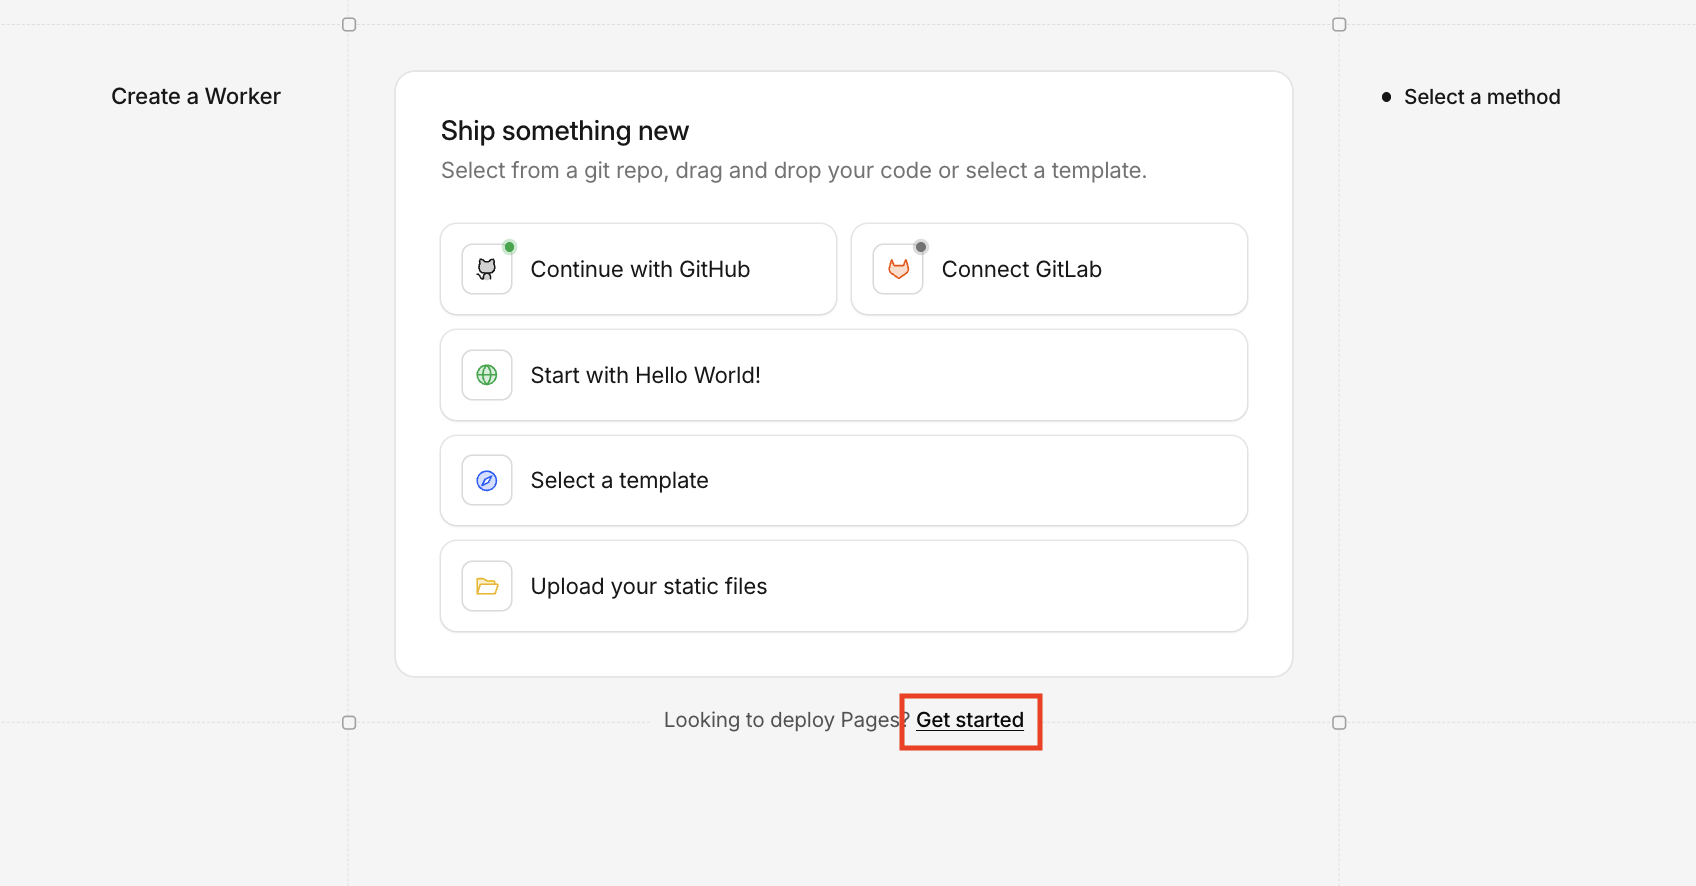
Click on the link to Get Started. Because we’ll be using the older Pages deployment flow.
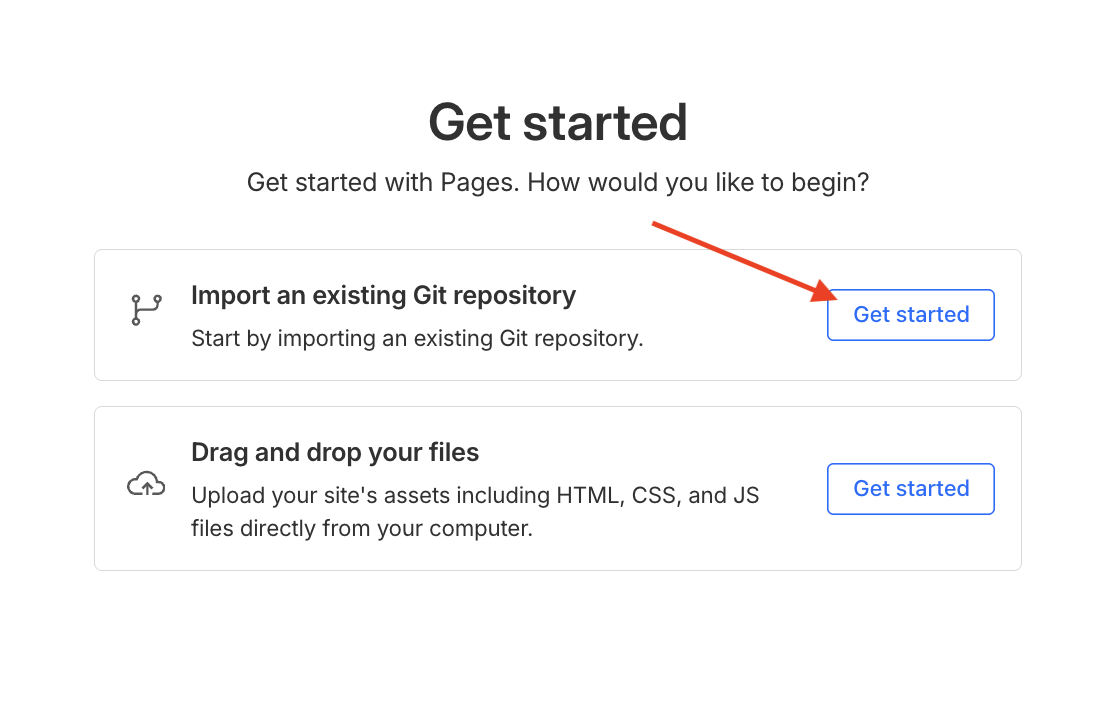
We'll want to set up automated deploys, so select the Get Started button for the Git repo.
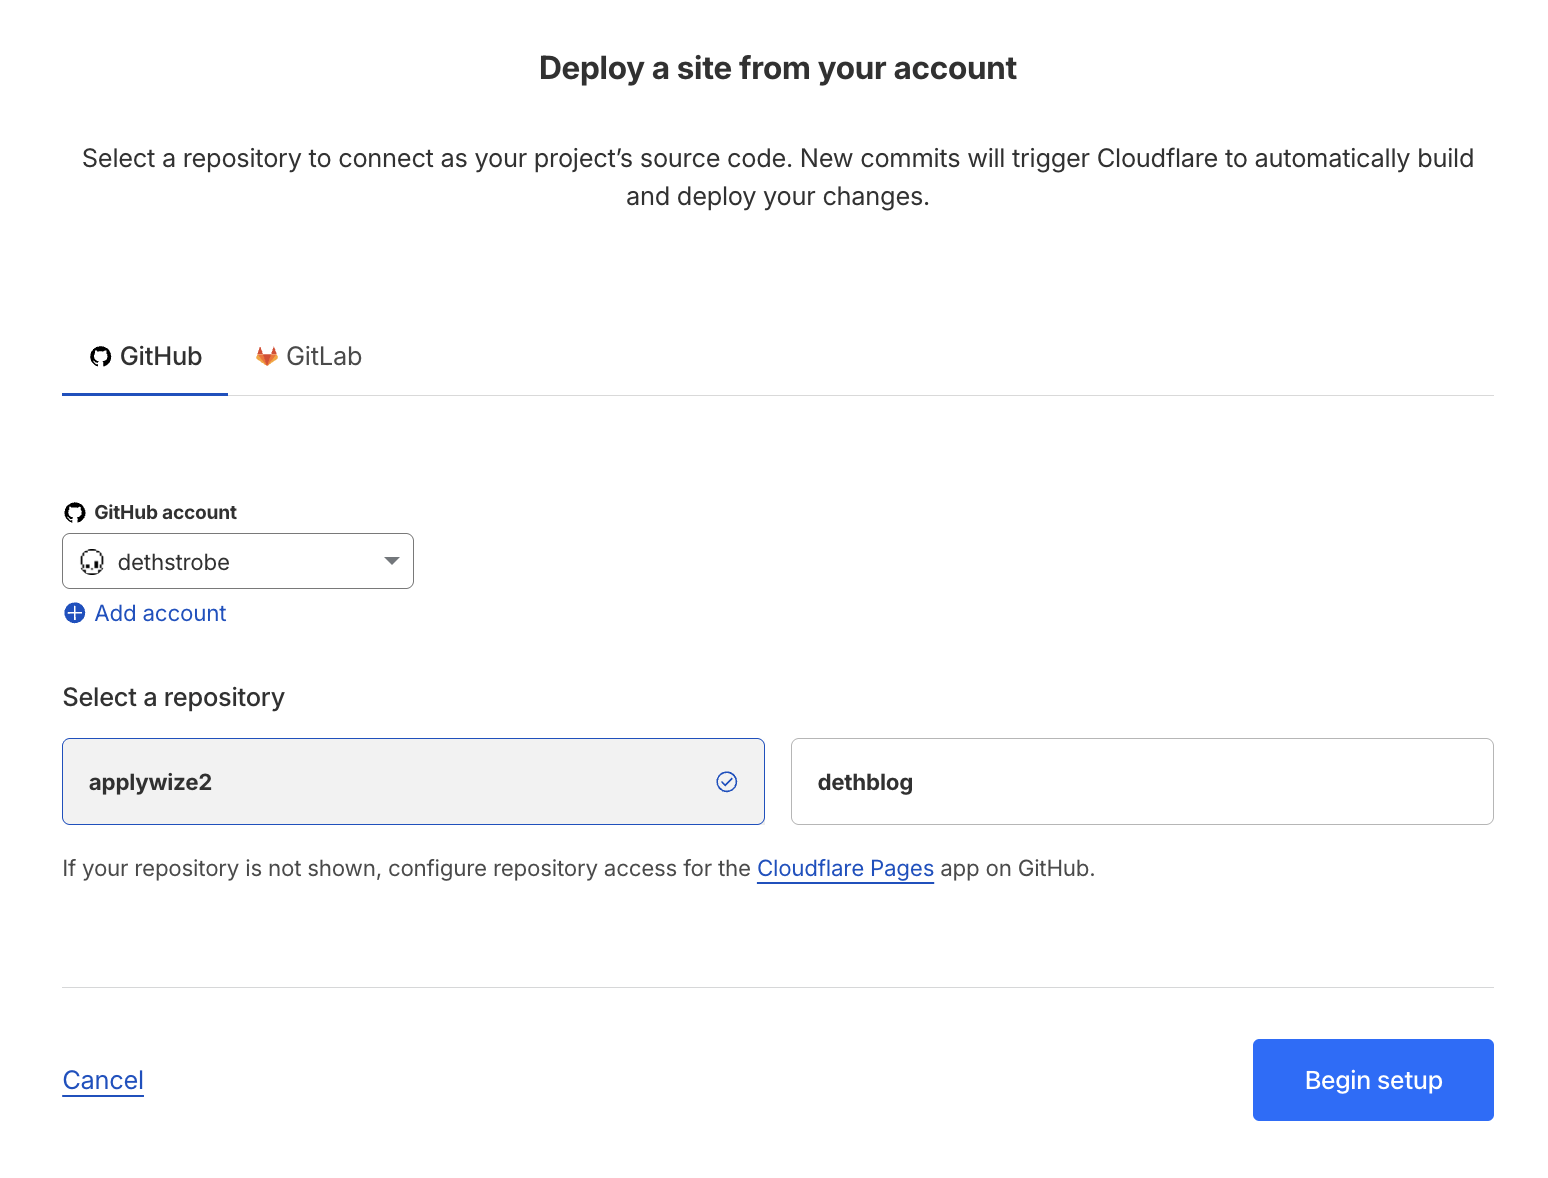
Select the repository you want to deploy to Cloudflare. In my case, it's applywize2. Then click the Begin setup button.
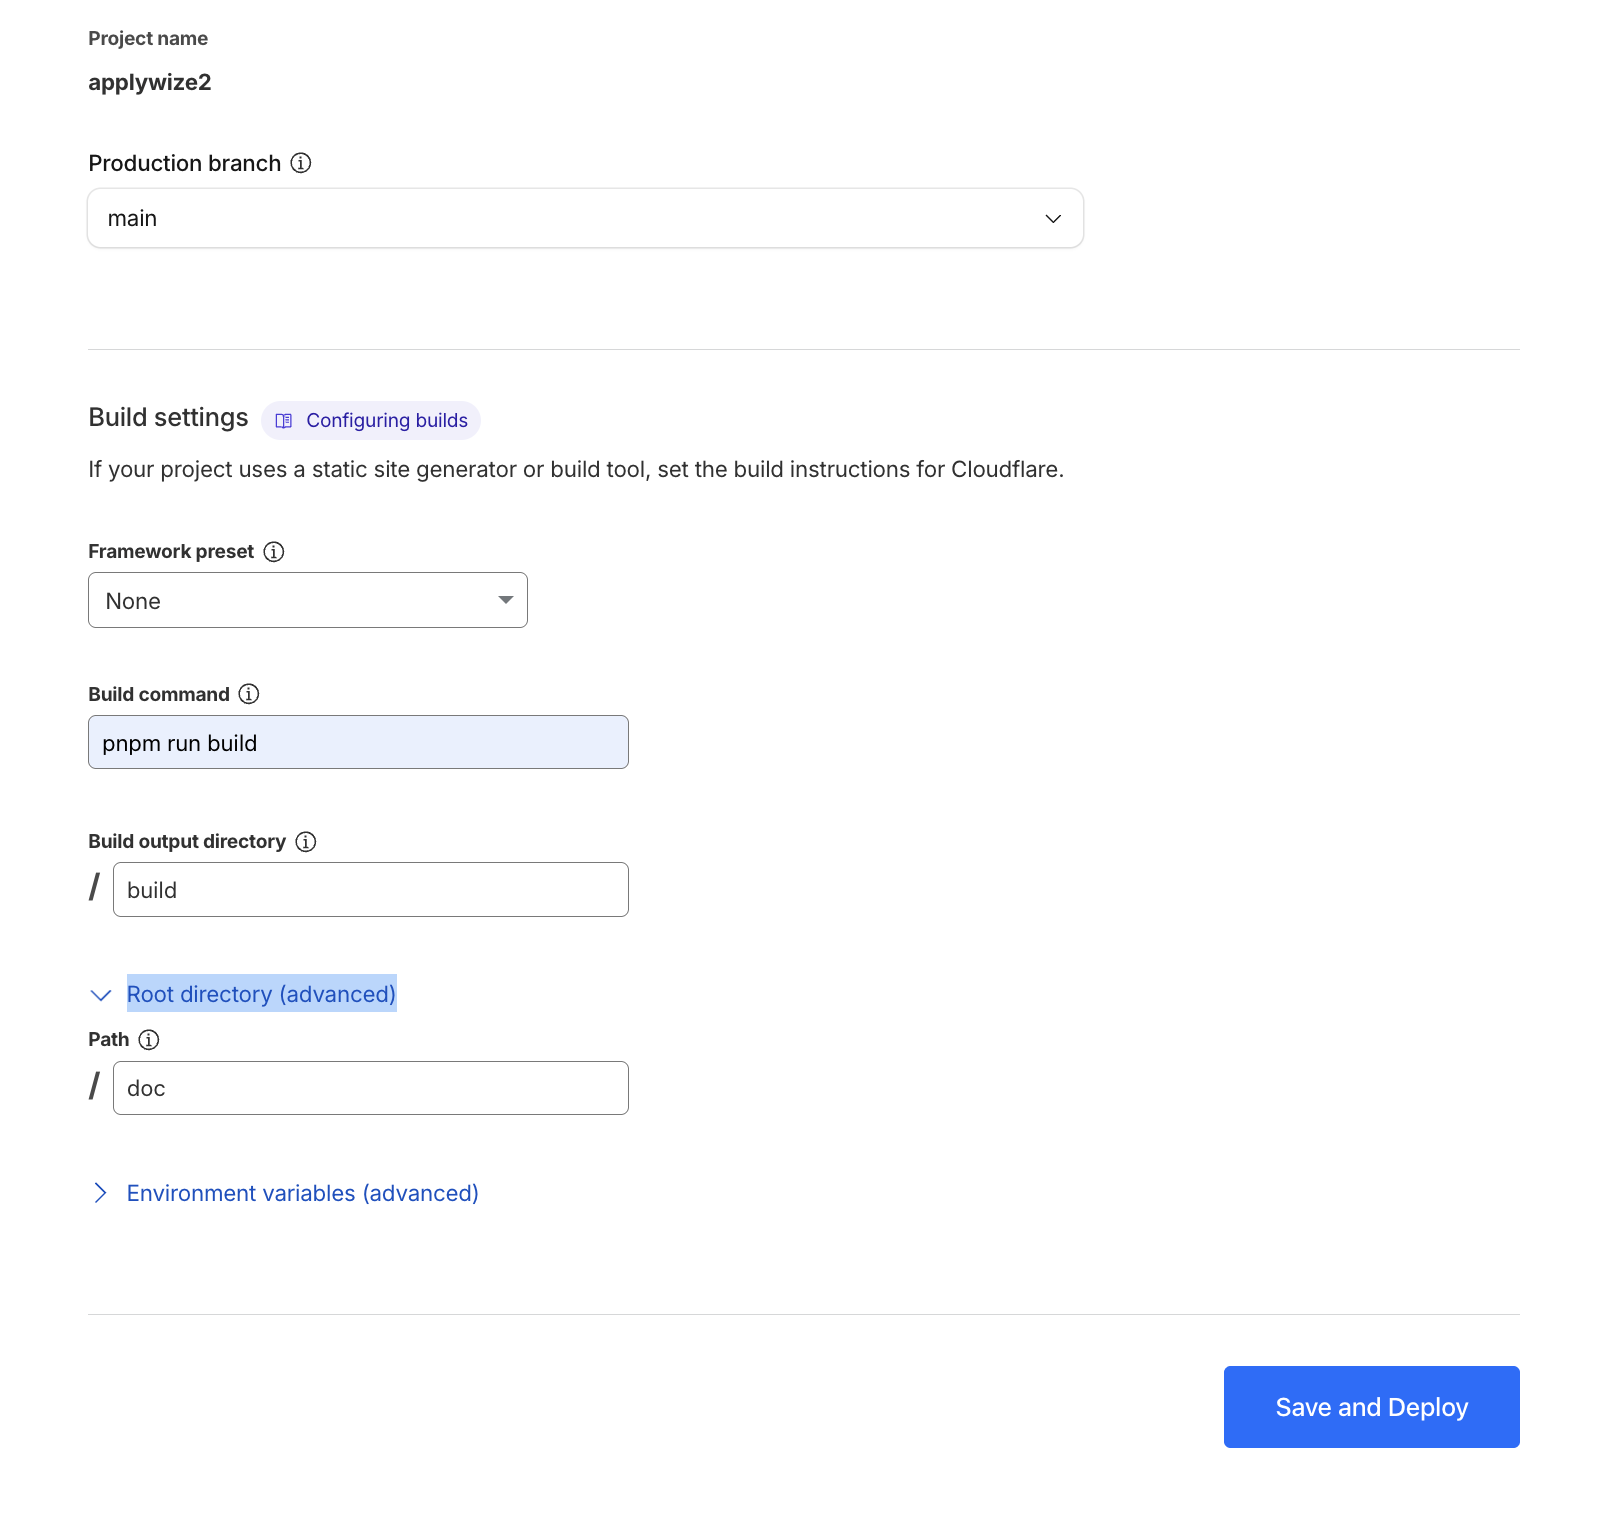
Now we'll configure our build.
- Leave Framework preset to "None".
- Set the Build command to the build script for your package manager.
- In my case, it's
pnpm run build.
- In my case, it's
- Set Build output directory to
build. - Click Root directory (advanced).
- Set the Path to
doc.
- Set the Path to
- Click the Save and Deploy button.
After that, Cloudflare will deploy your project and watch your repo for changes to automatically deploy your doc site.
The difference between Pages and Workers
The Applywize site we built uses Cloudflare Workers to dynamically build the site on the fly. It does this with RedwoodSDK and because of how Cloudflare works, it does it as close to the users as possible. This is called edge computing because the code to generate the website is executed on the edge of the network nearest to our users. It allows for extremely low latency, and we get it all for (relatively speaking) free.
The Docusaurus site on the other hand is a static resource website. Pages are not generated at run time dynamically, but instead are already built out and served to the users using Cloudflare's CDN network. This also allows for low latency for user requests.
Which one is better?
It's not a question of which is better. They both serve different purposes. If you want a dynamic site, RWSDK and Workers are a brilliant and easy choice. But if your content is static (like our doc site), going with Cloudflare Pages makes the most sense.
Closing
I hope you learned a thing or two about test-driven development, RedwoodSDK, accessibility, and automatically generating documentation from test.
Writing this tutorial was surprisingly harder than I thought it would be and really forced me to think out and explain why I program the way I do. I highly recommend everyone try writing a tutorial at least once in their career.
A special thanks to Amy Haywood Dutton for originally making this tutorial for RWSDK v0.
Also to the RWSDK team for giving me permission to fork this tutorial and update it to v1.
Code on GitHub
You can find the final code for this step on GitHub.